Thursday, April 22, 2010

Chickpea Patties

David and I are moving in about two weeks so we are systematically trying to clean out our pantry. That means that we have stopped buying bread and are trying to use all of our flour and yeast to make bread. We are getting to the point where we are having to get a little creative with the meals. We are almost out of wheat flour and are going to have to start in with the oat, rye, and rice flours for bread. Also, we are trying to use all of our canned and dried beans and grains. I think this recipe by Macheesmo will allow use to use the two remaining cans of chickpeas we have left in our pantry!


Chickpea Patties: "

It’s no secret that I’ve been trying to eat less meat this year. I’ve found it easier than I expected honestly, but I’m always on the look out for quick and easy veggie meals that are packed full of flavor. That’s exactly what you’ll get from these chickpea patties.


The alternate name for chickpea patties is Falafel on Steroids. But really they don’t taste that much like falafel other than the fact that they are made from chickpeas (Garbanzo beans depending on where you’re from).


Served with a simple salad, these are a great dinner.
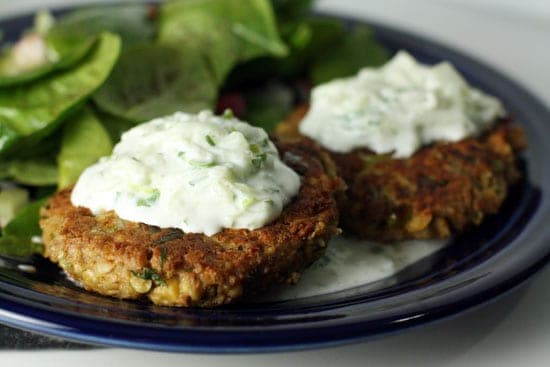

chickpea patties

Healthy AND Tasty


There are two parts to this meal that make it special. First, the garam masala. It’s fantastic and I doubled it for my version over the original recipe. Second, the greek yogurt sauce is very good. One of the better versions I’ve had.


Also, this looks like a decent list of ingredients, but there’s a lot of duplicates actually so it’s really easy to prep if you do everything at once.


Chickpea Patties with Yogurt Sauce (Adapted from America’s Test Kitchen 30 Minutes Suppers )

Makes 8 patties.


- 2 (15-ounce) cans chickpeas, drained and rinsed

- 2 Teaspoons garam masala (original is 1 tsp.)

- 2 Tablespoons olive oil

- 2 eggs

- 1/2 Cup toasted bread crumbs

- 4 scallions, minced

- 1/2 Cup Greek yogurt

- 3 Tablespoons cilantro, minced

- Pinch of salt


Tzatziki Sauce:

- 1 Cup Greek yogurt

- 1 cucumber, shredded

- 2 Tablespoons scallions

- 1 Tablespoon cilantro

- Pinch of salt


Making the Tzatziki. The next time I make this, I’m going to make a double batch of the sauce. It would be so good on pita as a snack or on a ton of different sandwiches. In all seriousness, I could eat it with a spoon.


The only hard part (and it isn’t that hard people) of making this particular tzatziki recipe is shredding the cucumber. Sometimes I like it chunkier, but shredded was nice for this version. Basically, just peel your cucumber and scoop out the seeds with a spoon. Then shred it into a colander using the large holes of a grater.


Sprinkle a pinch of salt on the shredded cucumber and let it sit for 10-15 minutes. It’ll lose some moisture so you may want to set it over a bowl or a few paper towels.
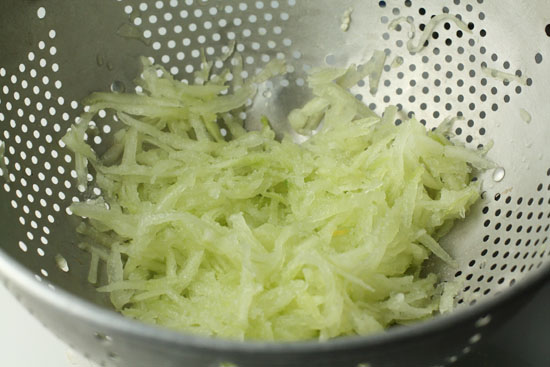

shredded cucumber

Peeled, seeded, shredded, salted.


Once your cucumber is ready, just mix up the rest of your tzatziki ingredients in a big bowl. It should be pretty thick. Take your time chopping your ingredients evenly so you don’t get a big bite of scallion or something.
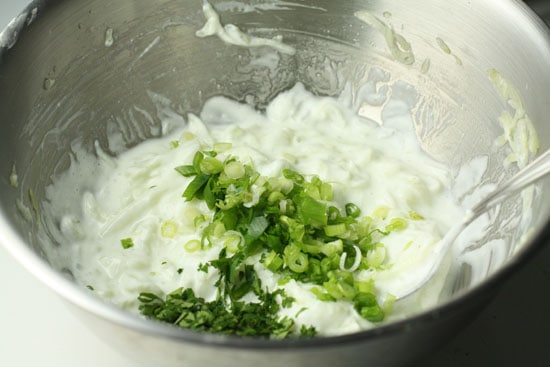

yogurt sauce

Nice and tangy.


This will keep fine in your fridge for a day or two or probably longer but it won’t last that long.


Making the patties. These patties are pretty easy to make and while the original recipe only makes 6 patties, I was easily able to get 8 good sized ones from the recipe.
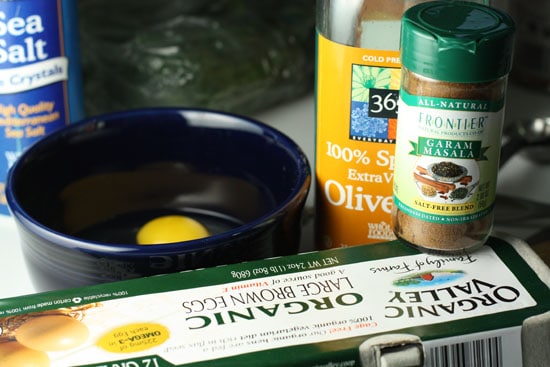

patty ingredients

Not pictured: breadcrumbs and chickpeas


To start, I added my breadcrumbs to a dry pan and toasted them over medium heat for about 5 minutes. You want them a light brown color, but definitely not burned. They should look something like this:
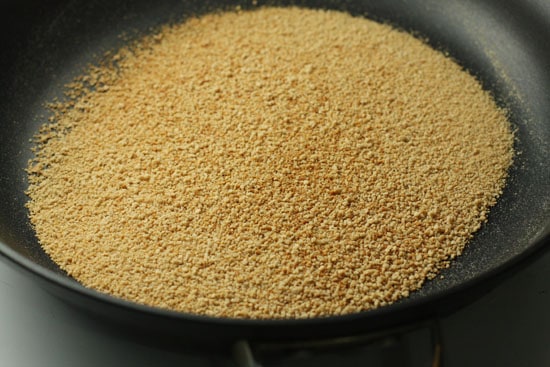

toasting

Don't burn them!


That’ll give them a slightly nutty flavor and also help them absorb even more moisture.


Next, whisk together your eggs, garam masala, oil, and pinch of salt into a small bowl. It’ll look strange, but smell really good.
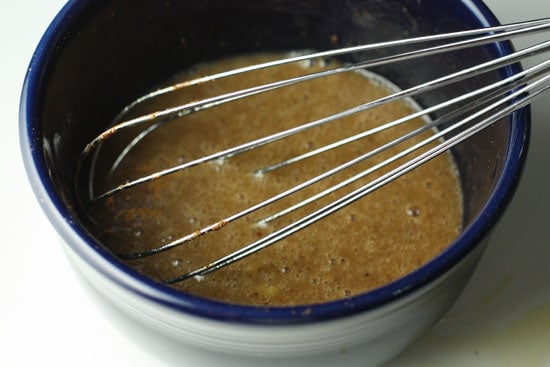

spice mixture

Smells good.


Add all your drained and rinsed chickpeas into a large bowl and mush them up with either a fork or a potato masher. I used a fork and left mine pretty chunky actually. You could make it smoother if you wanted, but I’m lazy.
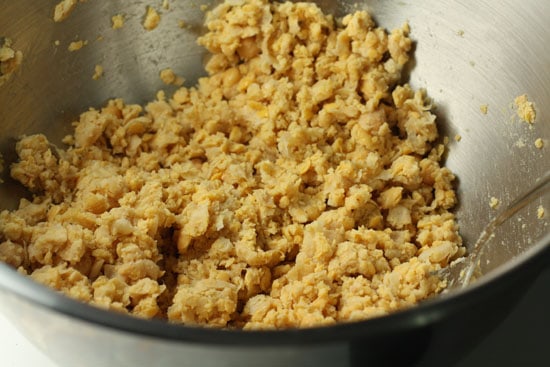

Mush

A fork is your best bet for this.


Then stir in your egg/spice mixture, breadcrumbs, and all the other ingredients. You’ll end up with this very thick paste of sorts. Again, it doesn’t look great, but it’ll smell really good and trust me it’ll taste good also.
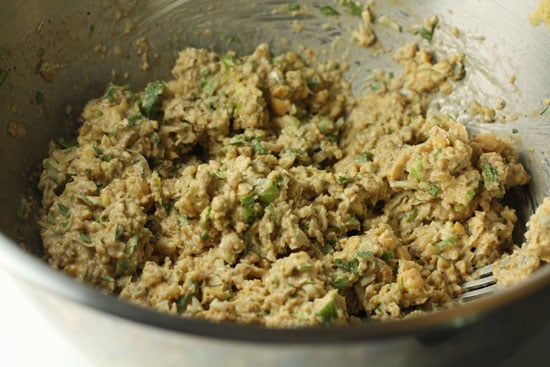

finished mixture

I realize this does not look appetizing.


Making and Cooking the Patties. Forming the patties is straightforward enough. Just divide the mixture into 8 (or 6) equal parts and then form round patties out of the mixture about 3/4 of an inch thick. Try not to press the mixture together too much. Keep it light.


Then, in a pan over high heat, add 2 Tablespoons of olive oil and when it’s glistening, add your patties. You’ll probably have to work in two batches unless you have a really big pan.
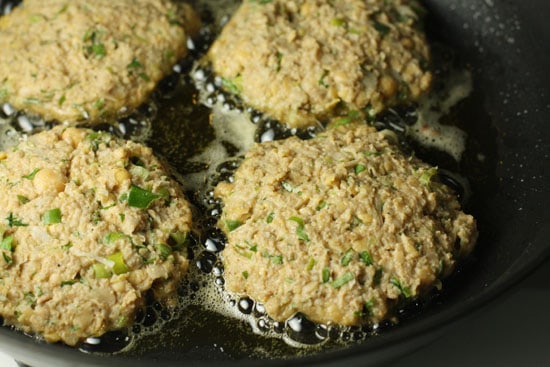

frying patties

How about now?


Four to five minutes per side and you should end up with these lovely, browned patties.
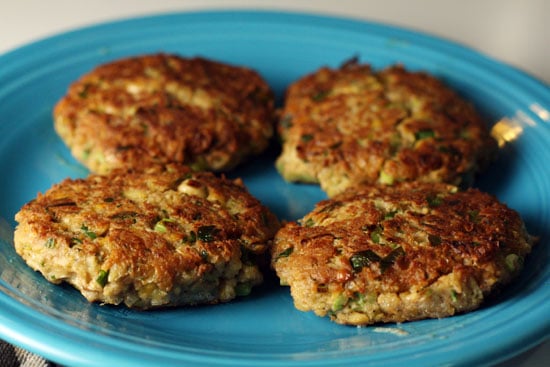

fried patties

Or now?


I served mine with a small salad and a good amount of the yogurt sauce. Very tasty!
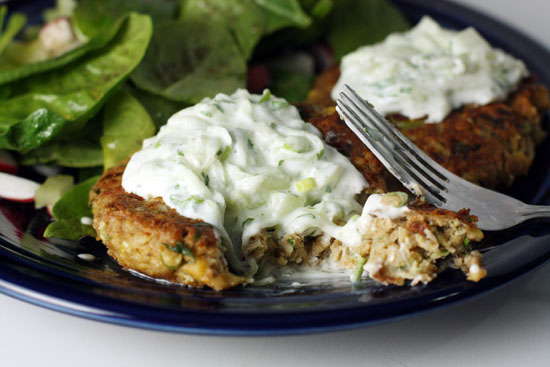

bite

Would also be a good veggie burger!


As soon as I took a bite of this though, the first thing I thought of was veggie burgers. These would just rock as burgers. The burger route opens up a lot of options. Have the patties with a salad for dinner and then take one or two burgers for lunch the next day!


These are versatile and delicious little things. I didn’t miss the meat for a second when I was done eating them!

"

Wednesday, April 21, 2010

Adipoli Parathas

What the HECK!?!?! this looks amazing...however, it does seem like it would take all afternoon to make.

Thanks Food Stories


Adipoli Parathas: "


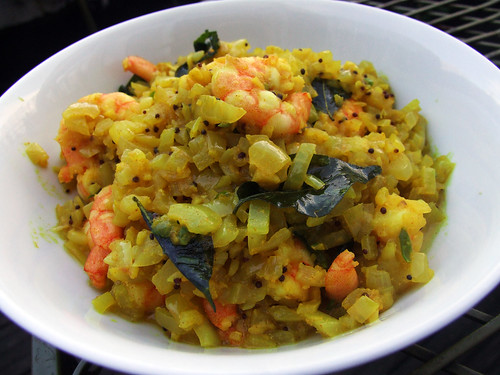
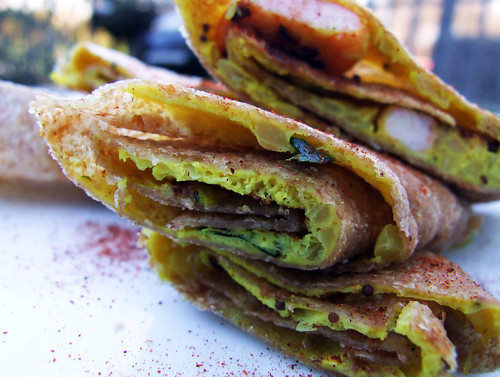
The tava is still my favourite new toy. For a while, I didn’t even put it away but just let it sit on the worktop so I could look at it more, like a new pair of shoes that you just can’t put in the cupboard. I started basic with chapatis and then felt ready to move on to parathas. It was supposed to be a gentle learning curve until I spotted this gorgeous stuffed version; it had to be done.


This is from the brilliant ‘Indian’ by Das Sreedharan; hopefully I won’t get into trouble for publishing another of his recipes. I can’t understand why the book isn’t more popular to be honest. I found mine for a stupidly low price and quite a few others have told me how they found it in a bargain bin. Das is from Kerala and it’s packed full of South Indian recipes; coconut, curry leaves and mustard seeds are predominant flavours throughout.


Apparently, this recipe is based on “the popular Ceylonese tradition of flat, thin bread dough stuffed with…seafood masala.” You make the paratha dough (wholemeal flour and oil) and then slap it on the hot tava before smearing with the mix of prawns, egg, onion, chilli and spices. This cooks briefly and then you flip so that the coating sears and sizzles instantly on the tava. You flip again and then roll it all up.


They are dangerously moreish. Crisp paratha and soft, spiced stuffing, fragrant with the essential curry leaf; every now and then a succulent prawn. It’s really tempting to re-make and pack ‘em to bursting but this is one of those times to resist – knowing when to stop and all that. They look weird while you’re cooking them (a bit like someone sicked up on a paratha – there’s no denying it), but once rolled, we’re talking high quality stuffed carb here – we ate four each in one sitting and yearned for more.


I suggest you make a steaming great heap of them. There’s nothing else for it. You won’t need any accompaniments except perhaps something to dunk them into – they’re a meal in themselves.


Adipoli Parathas (from Indian by Das Sreedharan)

(makes eight)


225g wholemeal flour

4 tablespoons vegetable oil, plus extra for brushing


For the filling


8 tablespoons vegetable oil

1/2 teaspoon mustard seeds

2.5 cm piece ginger, peeled and grated

2 onions, peeled and finely chopped

1 green chilli, chopped

10 curry leaves

1/2 teaspoon turmeric

150g raw prawns, peeled

2 eggs, beaten (I used 3)

salt


To make the paratha dough, put the flour in a bowl and gradually stir in the oil and about 150ml water to make a soft, pliable dough. Knead for 3-4 minutes, then return to the bowl, cover and set aside for an hour.


To make the filling, heat the oil in a frying pan. Add the mustard seeds and when the start to pop, add the ginger, onions, chilli and curry leaves. Cook over medium to low heat for 5 minutes, stirring every now and then until soft. Add turmeric and salt and cook for 1 minute then add the prawns until pink and cooked through. Remove the mix from the pan and set aside.


Divide the dough into 8 equal portions. Roll one into a ball before rolling out into a circle as thinly as possible. It should be paper thin and about 8-9 inches in diameter.


Heat a tava, griddle or frying pan and brush with oil. When hot, slap on a circle of dough (the heat should be medium). Cook until it starts to turn golden. Stir the eggs into the prawn mix, lower the heat and then spread 3 scant tablespoons onto the paratha. Leave until the egg is pretty much cooked and then flip, searing the mix onto the paratha. Wait until it is stuck well on there before you flip again and cook briefly. You want it nicely golden underneath.


You now just roll it up. I kept mine warm in a very low oven while I made the rest. I served them cut into two or three pieces each with a yoghurty dipping sauce which had some coriander, chilli and lemon juice stirred through (I think). A dusting of chilli powder on the parathas is really good.


diy project: kate’s painterly silhouettes

This seems like a great and easy decorating idea....perfect for any room in the house! What do you think this would look like in the sewing room with different craft silhouettes? Thanks Kate!


diy project: kate’s painterly silhouettes: "


i love the crisp, graphic nature of silhouettes. I know that you’ve seen a lot of silhouette designs though, so i tried to give you a project that rethinks the traditional form a bit by allowing you to add your own style to it. the great thing about working with these contact paper cut-outs is that you can paint any way you want! i went for a fun stripe inside silhouettes of masculine objects, to make a gift for my man (they kind of remind me of the jack spade look, which i love). but you could go crazy with the painting style here: splatters, drips, impressionistic, color blocking, camouflage, it would all look great! once you cut the shape out cleanly, you don’t have to worry much about painting accuracy, which is the other great thing about cut-outs. trust me, there is nothing more satisfying than peeling back the paper to reveal a perfect, pristine outline. i hope you have fun experimenting with this one. have fun! – kate


*click here to check out kate’s biz lady post from yesterday on creating great window displays for your store!


CLICK HERE for the full how-to after the jump!


(more…)


"

Tuesday, April 20, 2010

Italian Onion and Bean Soup with Parmesan Toast

Yep, I have found dinner for tomorrow night. I just found a recipe for whole wheat sandwich bread that would be perfect for the topped croutons!

Italian Onion and Bean Soup with Parmesan Toast: "Tender cannellini beans, just-wilted fresh arugula leaves, and good white and red wines add flavour, colour and depth to this Italian-style baked onion soup topped with crusty bread and freshly grated Parmesan cheese. Not only delicious and a nice impression on your guests, this minestra di cipolle e fagioli in crosta is also very easy to make. It's also my entry for this month's onion-family themed No Croutons Required hosted by my wonderful friend Jacqueline.

If you have a rind left over from grating the Parmesan cheese, add it during the simmering stage of the soup. This or the rind of any other hard aged cheese lends a wonderful depth and base to the stock of any savoury bean or vegetable soup, and they can be refrigerated or frozen for later use.

This recipe is loosely adapted from Marlena de Blasi's A Taste of Southern Italy — a unique and attractive collection of authentic dishes that are unfortunately almost uniformly non-vegetarian. But there's nothing wrong with a vegetarian using a little imagination to transform a salt-pork soup like de Blasi's original into a meatless delight.
Italian Onion and Bean Soup with Parmesan Toast

(Minestra di Cipolle e Fagioli in Crosta)


Fagioli:

1/2 cup cannellini (white kidney) beans
4 cups vegetable stock
1 bay leaf
1 dried whole red chili


Minestra:

2 tablespoons olive oil
1 lb. Vidalia or sweet onions, peeled and thinly sliced
6 cloves garlic, peeled and slightly crushed
1/2 tablespoon sea salt
3/4 teaspoon brown sugar
2 1/2 cups reserved bean cooking liquid
1 cup dry white wine
1/2 cup red wine
1 cup fresh arugula leaves, torn or shredded
4 1/2-inch slices of crusty bread
1 cup fresh grated Parmesan cheese
olive oil for drizzling
fresh ground black pepper


Rinse the beans and soak overnight covered in several inches of cold water with a little yogurt whey or lemon juice added. Drain and add to a medium saucepan. Cover with the vegetable stock, bay leaf and dried red chili. Bring to a boil, then immediately reduce the heat to low, cover, and let simmer for 1 to 1 1/2 hours or until the beans are soft. Discard the chili. Drain, reserving the cooking liquid and bay leaf, and set aside.

Heat the olive oil over medium heat in a large cast-iron skillet or stove-top safe casserole. When hot, add the onions and garlic and toss until the onions are translucent, about five minutes. Turn down the heat a little and sprinkle on the sea salt and brown sugar. Cook, stirring frequently, until the onions are golden-brown and slightly caramelized, about half an hour.

Pour in the white wine and 2 1/2 cups of the reserved cooking liquid from the beans. Add the bay leaf, and bring to a simmer. If you have a Parmesan rind, add this to the soup as well. Cook for 20 minutes. Now add the beans and red wine, and simmer gently for five more minutes. Remove from heat and discard the bay leaf and Parmesan rind if using.

Pre-heat the oven broiler. Toss the arugula leaves into the soup. Lay slices of bread over the soup, sprinkle the bread with Parmesan cheese, and drizzle olive oil over the bread and cheese. Generously dust the bread and soup with plenty of fresh ground black pepper.

Place the skillet or casserole under the broiler to toast the bread and melt the cheese. Carry hot to the table and ladle soup and bread into warm bowls. Serves two to four.

Other Italian-style soups you may enjoy:
Tuscan-Style Pinto Bean Soup with Kale
Cannellini Bean Soup with Fontina Gremolata
Tuscan Bean Soup with Fresh Rosemary
White Cabbage and Bean Minestrone

© Copyright Lisa's Vegetarian Kitchen. For personal use only.

If you are seeing this on a site other than foodandspice.blogspot.com, it is being stolen.


"

Monday, April 19, 2010

Throw a Bring Your Own Ingredient Party!

Wow! what a great and fun idea! We are going to do this as soon as we get settled in Knoxville! Thank for the great idea Kitchen!


Throw a Bring Your O


wn Ingredient Party!: "041910-ingredients2.jpg One of our favorite ways to prep for a dinner party is by doing nothing at all. Sure there's still household chores to be done, but when it comes to preparing dishes and prepping ingredients, why bother — throw a "Bring Your Own Ingredient Party." It's the most fun you can have at a dinner party (without dancing on the table) and always keeps things fresh and lively.

Read Full Post


"

Tuesday, April 13, 2010

How To Make Your Own Lunch Box Ice Packs

Interesting....but what if it explodes in your lunch box.

How To Make Your Own Lunch Box Ice Packs: "


Having an ice pack for your lunch is a great idea when it comes to keeping cold things cold, but did you know you can make them yourself? They're ridiculously easy, inexpensive, and easy to reuse in your kitchen if their services are no longer needed. Trust us, your fresh salad or tuna sandwich will thank you!

Read Full Post"

Wednesday, April 7, 2010

My axe, let me grind it

I was thinking of making gnocchi tonight with sweet potatoes. I saw this recipe and it look amazing (plus, 101 recipes is one of my fave blogs). We don't have any kale but we did get some collards at the FM this weekend....dinner is done!


My axe, let me grind it: "

If you’re one of those who likes to opine that they were a vegetarian for a while but you got sick then got stuck in to the meat again and then you were better, I immediately conclude that you are a giant child.


Let me back up. I’ve been a vegetarian for fifteen years now. For reference, I started when I was twelve, and I haven’t stopped since. I’ve had extensive bloodwork to investigate my arthritis, and my levels of every vitamin and mineral except vitamin D are completely normal, and vitamin D comes from the sunlight I strenuously avoid. If you’re reading this and thinking no, I tried being a vegetarian and I got totally sick because I am a delicate and unique snowflake and I need meat, then I am calling bullshit on you. If you got sick during your tenure as a vegetarian it’s because you did it wrong, and it is incredibly easy to do right. How do you do vegetarianism right? You eat a lot of different things, you eat often, and you quit your complaining.


I’m cranky because I’ve had a few encounters with anti-vegetarian and vegan sentiment, and I’m fed enough to want to declare to the whole internet that cheap jokes about sickly vegetarians are childish, and I am not the only one. I went to a comedy festival event on Monday where no fewer than three comics had a go at vegetarians and vegans, making lame jokes about ruined immune systems and lethargy and weakness, and I was wishing some vegan strongman would come in and throw a giant sweet potato at each shitty comic.


To be honest, the biggest reason for me remaining vegetarian so long was a teenage desire to prove it’s not a phase. After ten years I realised it wasn’t a phase, but I had no real desire to eat meat when I was healthy and energetic and ate better than most meat eaters I know. I love food, and I wouldn’t deprive myself, and there is a world of great food without meat.


So grow up, haters, and eat some goddamned kale, just as my cat does.


catkale.jpg


kale.jpg


gnocchi.jpg


Pan fried gnocchi and kale

Serves two. Via 101 Cookbooks.


  • A bunch of kale

  • A packet of gnocchi

  • A garlic clove, smashed

  • Parmesan, if you eat it.


Remove the stems from the kale and slice finely. Put into a colander and wash very well. Heat a slug of olive oil in a large pan over medium-high heat and add the gnocchi in a single layer. Turn once, when appropriately browned and crusty. Turn in the kale and garlic and cook, 4-5 minutes, until the kale reduces a little and tastes cooked. Add salt and pepper. Serve with parmesan, if you eat it, not that I’d judge if you didn’t.


Share This
"
\