Monday, March 22, 2010

Craft Time

So, I have been searching for little fun projects to do this summer. projects that will both enhance the new place and fun for me to do. Apart from BUYING Martha's new book on sewing and fabric crafts this project looks fantastically useful yet surprisingly easy! I cannot wait for April 1st to be here and I cannot wait to buy some new white dish clothes to experiment with!

New Sewing Book Giveaway!: "

book-picture-287x360


As Silke and Blake have explained, we are all looking forward to the launch of Martha Stewart’s Encyclopedia of Sewing and Fabric Crafts on April 1st. Yesterday I finally had the chance to look through a copy of the book, which I know is the result of so much hard work on the part of Silke, Nick and the staff of our books department. I’m the first to admit I have limited sewing skills compared to many in our office, so I feel I’m in a good position to attest to how truly inspiring and accessible the book is. There’s so much information, and beautiful images and illustrations on every page. I swear I learned five things I didn’t know just flipping though it. (eg. in the fabric glossary – I never actually knew what ‘chambray’ was, nor what is correctly called ‘raw silk’…) As Silke says, there are many different kinds of fabric projects included, printing (my favorite!), dyeing (soon to be my favorite?!), many kinds of embroidery and dozens of sewing projects for all skill levels.


Each of us will be posting about a project we love in the book, and after some deliberation I’ve chosen Batik, which I’ve never even tried, but I’m so inspired by this section that I think I’ll make it a spring project… I love how it combines printing (in wax) and dyeing, I can’t wait! I think I’m going to make some fabric and sew a simple dress from it- using this pattern, which I’ve always admired. (also in the book, of course!)


A98810_Clothesline


batikht

batikdyeht

Eggs in Purgatory

Saving money!!! Why is that always so hard for me? It seems like every time I try to save money a million things come up that I need (maybe a little want but mostly need). Right now, I am trying to save money by not buying any clothes (so sad) and eating cheaply. I saw this dish originally in a Portuguese cookbook; it is a great idea and delicious, as long as you don't over-cook the eggs. Also, it is dirt cheap, the only thing that might be cheaper would be beans and rice. I'll make this tonight!


Eggs in Purgatory: "

I’m not the only blogger that thinks that about 2/3s of dishes can be easily improved by adding an egg of some sort. Soup is no exception. This dish is classically called eggs in purgatory and there are a lot of different variations on it. Almost always a tomato broth is used to cook the eggs in but sometimes the eggs are scrambled.


I used a spicy, kinda rustic tomato soup for my version and went with a poached egg. This was a really healthy dinner and Betsy and I loved it.
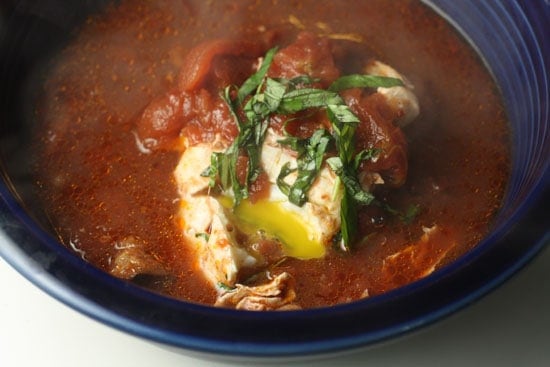

eggs in purgatory

The soup is good. The egg is great.


I found this recipe in a Body and Soul magazine actually. But I couldn’t find it again when I was trying to look it up to write this post. I made some changes to the original anyway though.


Eggs in Purgatory (Adapted from a Body and Soul recipe)

Serves 2-4


- 1 28 ounce can of tomatoes (I used fire roasted, but you can use your favorite)

- 4 large fresh eggs

- 3 cloves garlic, sliced

- 1-2 Teaspoons red pepper flakes (depending on how hot you want it)

- 1 Cup water or stock of your choice

- 3 Tablespoons olive oil

- Fresh basil, chiffonade

- 4 thick slices toast

- Salt and pepper


Preparing Everything. The only thing that’s somewhat important about this recipe is to make sure you get everything prepped before you start cooking. Once you start cooking, the dish comes together really quickly.


To start, chiffonade your basil. Don’t worry. It’s sounds fancy but it’s actually just the most efficient way to cut basil or any leafed thing really. Just stack up your leaves on top of each other and then roll them up tightly.
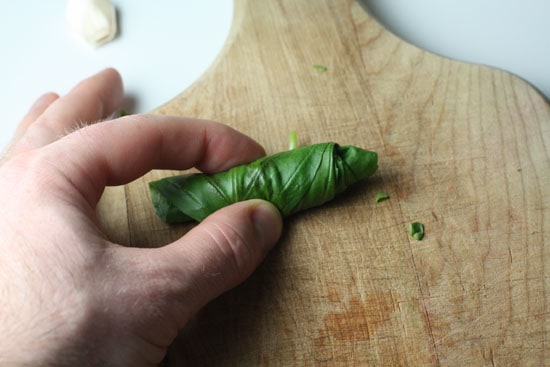

basil rolled

This is how you do it.


Then slice the leaves very thin and you’ll end up with these great strips of basil. It’s perfect to finish off a dish like this.
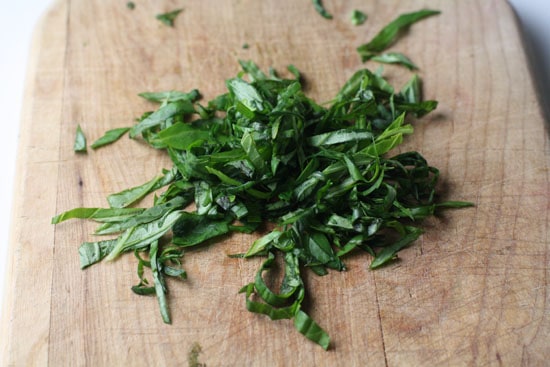

Chiffonade

It's called a chiffonade.


Set aside your basil for later and slice a few thick pieces of bread. I’m a fan of using no knead bread for this because it produces a really thick and crusty toast that holds up great against the soup. If you used crappy store bought white bread, you’d end up with soggy little bits in your soup.
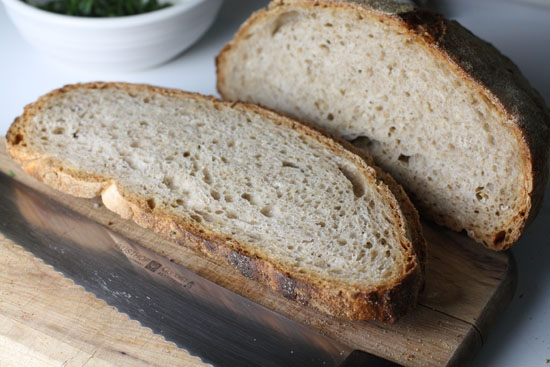

bread sliced

Good bread is very important to this dish.


Also, peel and slice very thinly your garlic and measure out your red pepper flakes. You could use up to 2 Teaspoons of red pepper flakes or mix in some cayenne if you want the soup to really pack a punch. I used about 1 teaspoon I think and it was a good amount of heat.
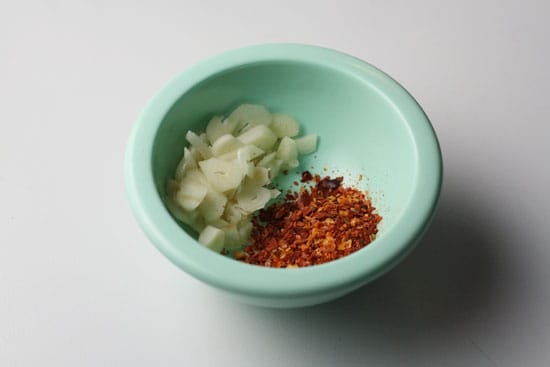

garlic and pepper flakes

Just some more prep.


Also, if your tomatoes aren’t crushed already, add them all to a bowl and crush them up with your hands.
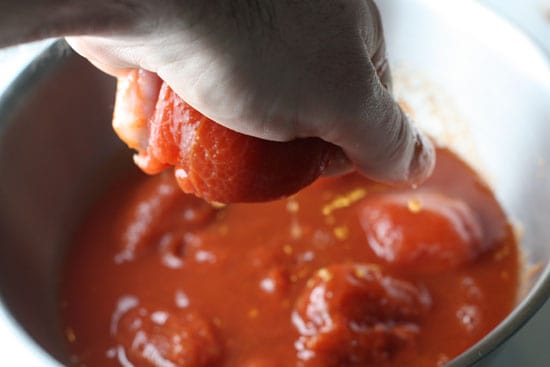

mushing tomatoes

Don't be afraid to get dirty.


Starting the soup. To start the soup, add your oil to a large sauce pan and add your garlic and pepper flakes. Fry these for a few minutes over medium-high heat until they become really fragrant and the garlic will start to turn lightly brown. Be careful not to burn!


You’re looking for something like this:
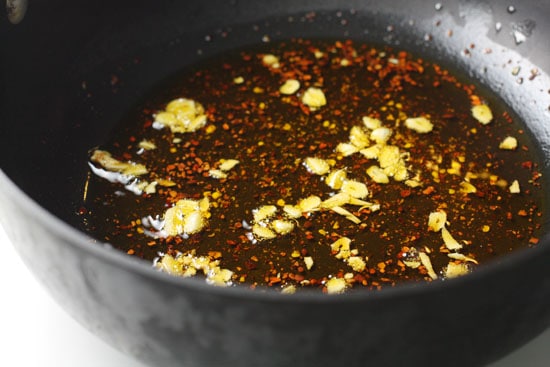

garlic and pepper cooking

Watch this closely.


Then add all your crushed tomatoes, the water, and a pinch of salt and pepper. Give this all a start and bring it to a simmer. Be sure to actually taste the soup to make sure the salt and pepper levels are good to go.


Now would be the perfect time to start the toast for this dish. Just add your bread slices to a 400 degree oven and let them toast for about 10-15 minutes. You want them to be really crispy.


Poaching the eggs. Cooking the eggs is about as easy as it gets. The only tip I have is to not get fancy and try cracking the eggs straight into the soup. That’ll lead to disaster almost certainly. Instead, crack all your eggs into bowls and gently slide them into the soup one by one. You can cook all the eggs at the same time, just spread them out over the soup.


The only other tip is to make sure your soup isn’t at a rolling boil. That would just break up the eggs. A light simmer is what you’re looking for.
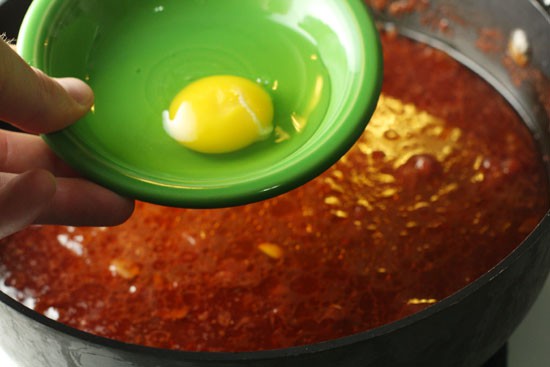

Eggs

Ready for a dip.


These will need to cook for 3 minutes for perfectly cooked poached eggs (runny on the inside).


Meanwhile, take your toast out and make sure it’s nice and crusty.
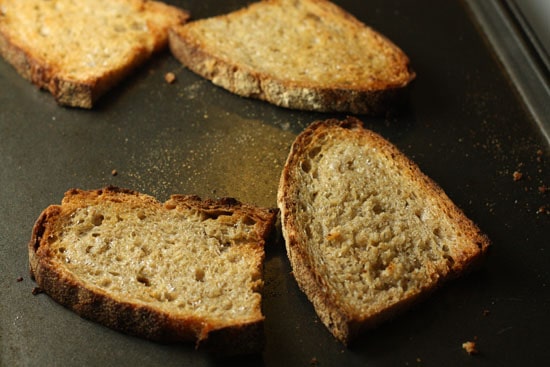

toast ready

Toast ready


Putting Everything Together. You have two options to serve this dish. Either you can just serve the bread on the side or you can actually add it to the bottom of your bowl! If you want to add it to the bottom like I did, it’s really important that you have crusty toast (have I mentioned that enough times yet?) or else you’ll have a big soggy mess at the bottom of your bowl.


Also, if you serve the toast under the soup, you’ll want to eat it as soon as possible. In any event, once your egg is done, take it out of the soup with a spoon and add it to your toast.
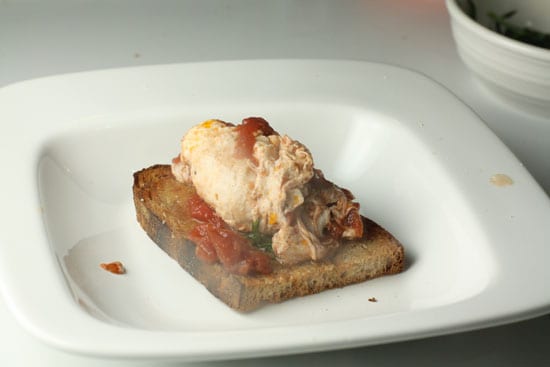

egg added

Looking good.


Then ladle your tomatoes over the eggs and add a pinch of basil to the top. This is good stuff.
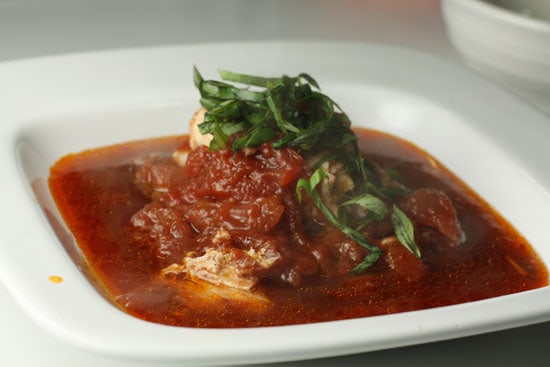

soup added

A great dish.


Start to finish this dish takes maybe 30 minutes. It’s really fast, healthy and tasty. Betsy and I ate it as dinner, but you could serve it for four people as an appetizer course (one egg per person).


I loved this dish and it’s on the make-again-soon list for me.


"

Saturday, March 20, 2010

Easy Brazilian Cheese Bread

Don't these just look interesting. I am going to have to give these a try; they would be great for a group party.


Easy Brazilian Cheese Bread:
Easy Brazilian Cheese Bread


Our tour of Brazil continues. After posting the moqueca recipe, several of you asked if I had a recipe for Pão de Queijo, or Brazilian cheese bread, sort of like a chewy cheese puff made with tapioca flour. As a matter of fact, I do. My friend Bill gave me this recipe years ago, a favorite from his Brazilian wife Silvia. I've made it several times, each time with different cheeses. Talk about addictive! I've cut Bill's original recipe down to just a third, because if I actually made a full batch (48) I could conceivably eat them all.


Continue reading 'Easy Brazilian Cheese Bread' »

Thursday, March 18, 2010

Banana Carrot Bread

I've had two frozen bananas in my freezer for about a month waiting for me to have both time and the will to make banana bread. I think I have found a winner with this Sisters' Cafe post. The only correction I would make is eliminating the sugar....There is NO WAY you would need sugar with all of those bananas. Maybe if your bananas are not at the peak of sugar development then at a tablespoon of agave but nothing else.


Banana Carrot Bread: "
I love this banana bread recipe! My favorite 'original' banana bread recipe is this Martha Stewart Recipe; however, this Banana Carrot Bread is totally different than your regular banana bread. It has cinnamon and nutmeg, brown sugar and grated carrots - You can imagine that it tastes very different from other banana bread recipes. I just love it! It's moist and flavorful, and the bits of carrot add a fun dash of color (of course you can't really taste carrot in it).
When I made this bread today I baked it in muffin liners instead of the pan because I had a slew of children at my house (8 at one point!) that I knew would just love getting to eat a treat in 'cupcake' form. Sure enough, they devoured these little gems. After giving the kids their share, I set a bunch of the muffins aside in a big ziploc baggy for a friend, and I thought I told the boys (three 4 year olds and a 2 year old) that they were not to eat them... But lo-and-behold, upon coming back into the kitchen after changing my little girl's diaper, the four boys were all devouring the last of the muffins from the bag! And they had impish little smiles on their faces! What stinkers! My 4-year old even had the audacity to boast that he had eaten TWO of them, right in the midst of my lecture that those muffins were not for them! :) I couldn't be too hard on them since they were probably very enticing, and it was more of a mob action than one little boy being mischievous. :)
This Banana Carrot Bread really is worth getting a lecture for, so I can't blame them at all!
I hope you enjoy it too!

Banana Carrot Bread

1 cup mashed bananas (~3 very ripe bananas)
1 cup brown sugar
¾ cup salad oil
2 eggs
2 cups sifted flour
1 teaspoon baking soda
½ teaspoon salt
½ teaspoon cinnamon
½ teaspoon nutmeg
1 cup finely grated carrots

Combine bananas, brown sugar, salad oil and eggs in mixer. Sift flour, soda, salt, cinnamon and nutmeg together in large bowl. Stir in banana mixture. Fold in carrots. Spoon into greased and floured large loaf pan. Bake at 350° for 45-50 minutes or until done. Do not over bake.
(When I made this in muffin form, I can't remember how long they took to bake. Just bake them for 18-20 minutes and check them, and then if necessary checked them a few minutes later, etc.)
"

Wednesday, March 17, 2010

spinach and chickpeas

DONE! Meal complete - we are making this tonight.


David and I are planning to make a version of a traditional Irish meal of cabbage and potatoes tonight (roasted potatoes with garlic and rosemary AND steamed cabbage with onions). However, I felt that there was something lacking (mainly a protein source). I found this recipe at Smitten Kitchen which will round out our St. Patrick's day meal nicely.


As for a night cap: Downtown Fort Pierce is having a St. Patricia's festival tonight so we might head down there for a pint of green beer!


Happy Green Day to all!


spinach and chickpeas: "

spinach and chickpeas, espinacas con garbanzos


First off, this dish is not called “spinach and chickpeas”, it is espinacas con garbanzos. Don’t you agree? “Spinach and chickpeas” is something you eat because you should — it is healthy and you aspire to be. Espinacas con garbanzos is something you eat because it sounds sexy, and doesn’t taste half bad either. It’s hearty and smoky with a little kick, you eat it on little fried bread toasts at a tapas bar in Spain.

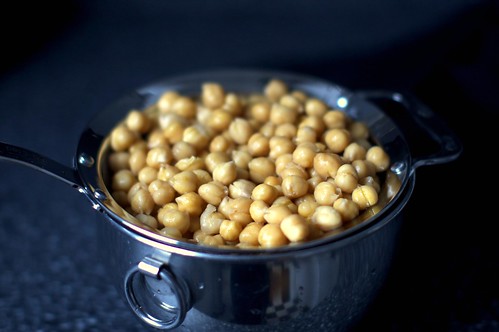
chickpeas, from the slow cooker


Or, you know, in New York City on another brutally rainy March night. My friend Ang had a tapas pot-luck last Friday (the baby ditched us for a better party at his grandparents house) and, yes, I brought a Spanish dish to a Spanish party that did not include a single format of pork. Wild! Hey, I figured others would have the chorizos and jambón serranos covered. Me, I wanted some Spanish comfort food. I’d tried a version of this dish a few years ago, thanks to the sweet nudging of Ximena at Lobstersquad and instantly loved it. It sounds like it would be too simple to hold your interest, perhaps something you’d eat because you “ought” to, but it tastes like something you’ll crave again and again.


draining the spinach


... Read the rest of spinach and chickpeas on smittenkitchen.com

Wordless Wednesday: Graham Crackers and Marshmallows

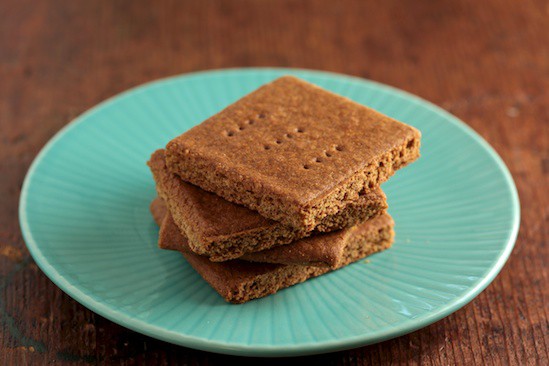
I have always wanted to make homemade graham crackers but I never knew where to find graham flour. Basically, graham flour is whole wheat flour ground in a different way. So, potentially, graham crackers could be good for you....well, maybe just a healthy dessert. Also, I would experiment using regular whole wheat flour so I don't have to buy yet another type of flour (I am sure purists would scoff at that idea).

Thanks to "Pinch My Salt" blog for this great idea.


Wordless Wednesday: Graham Crackers and Marshmallows: "

Homemade Graham Crackers


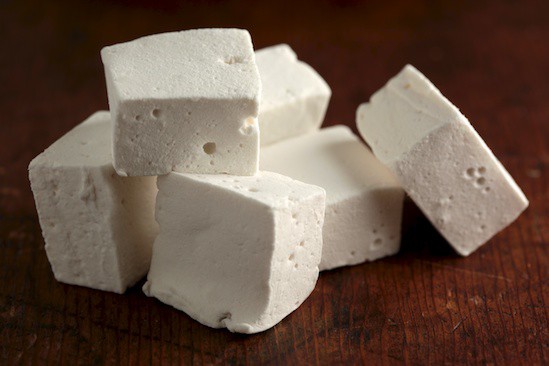
Homemade Honey Marshmallows


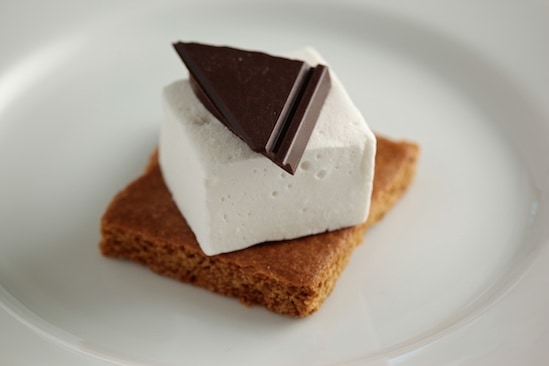
Almost a S'more


Marshmallows and Graham Cracker Crumbs


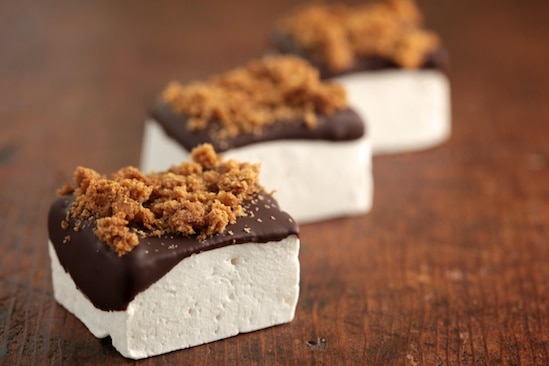
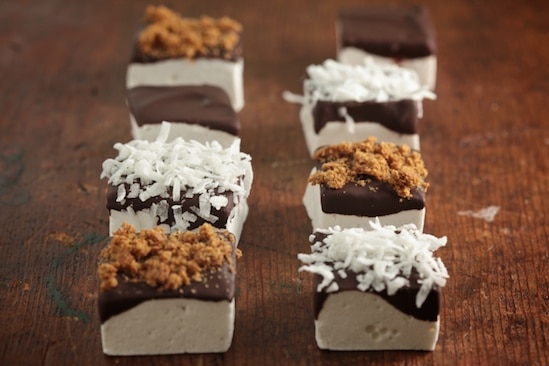
Homemade Marshmallows dipped in Chocolate


Monday, March 15, 2010

Hypertufa Behind the Scenes

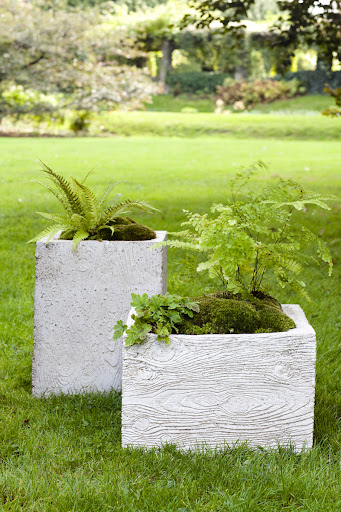
I saw these in the spring edition of Martha Stewart Living and was excited to make them for the new house. I love the tables too and I am thinking they might actually work well for bed side tables as well.


Hypertufa Behind the Scenes: "

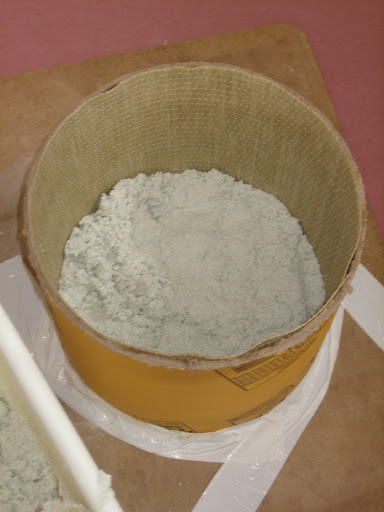
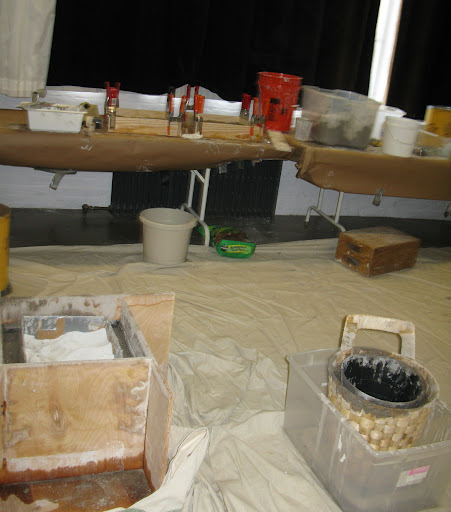
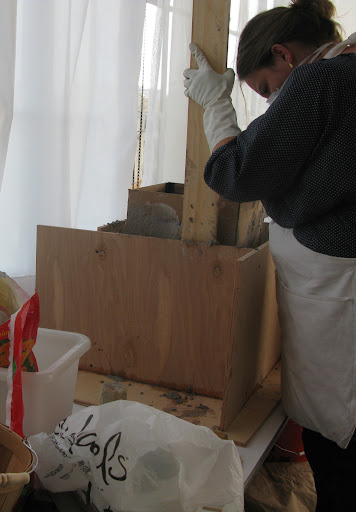
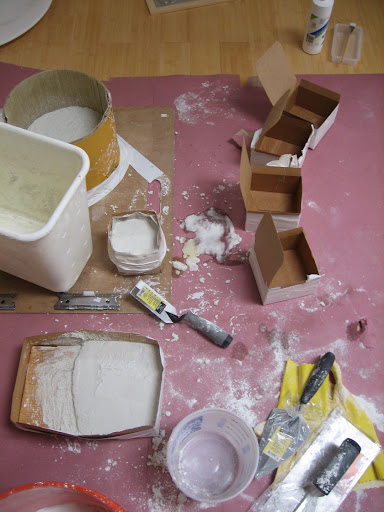
Pansies_001Spring is in the air in New York which has me excited about plants and gardening for the summer. I currently have big plans to make Hypertufa Pots from our March issue and create an oasis on my roof for the summer. Hypertufa is a stone-like substance made by mixing peat moss, perlite, and portland cement with water. After a bit of trial and error I found the process quite rewarding and even a bit addictive. Here is a behind the scenes look at the development process – and for instructions on how to make them click here.


Back
Next
1 of 17


1 Some very initial experimenting with boxes and cement tubing for molds.


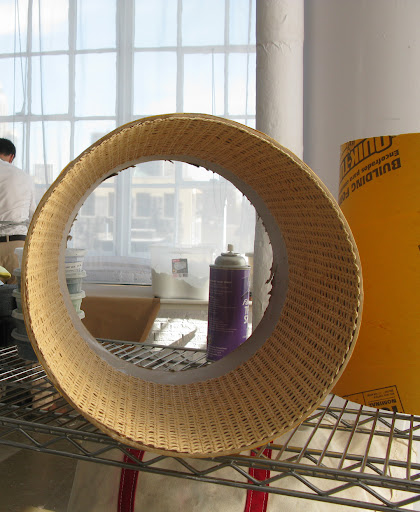
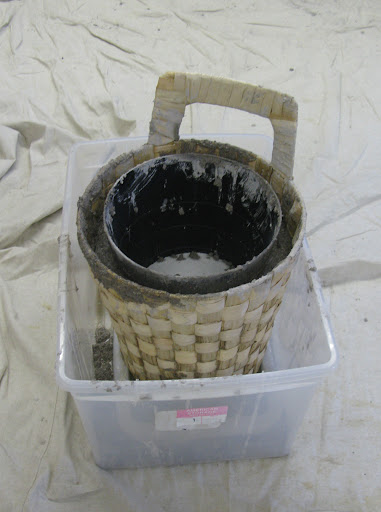
2 I tried lining chair caning in cement tubing from home depot


3 The sand was too heavy and didn't really capture the textures the way I had hoped.
The pot looked a bit like a tire - so that idea stopped there.


4 Hypertufa is best done outdoors. Since that wasn't possible we covered the floors with drop cloths - at times it still got a bit messy.


5 Making one of the first Faux bois planters.


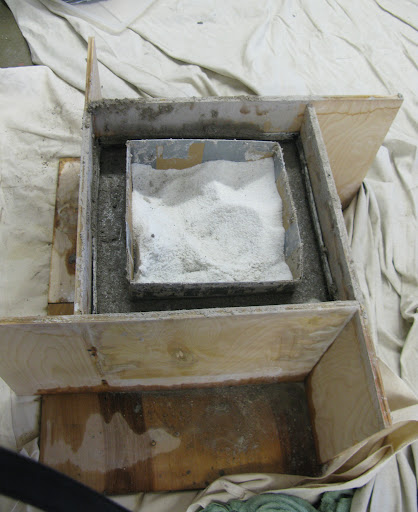
6 Once filled the mold sets for 36 hours


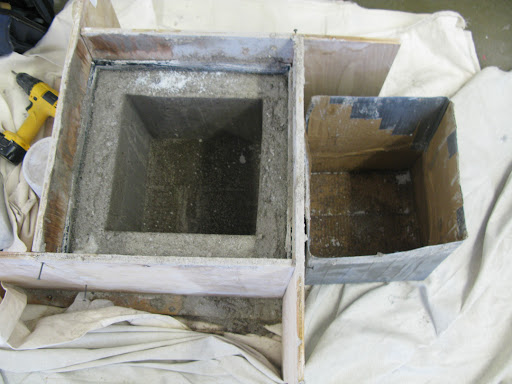
7 Faux bois planter with inner container removed


8 Two finished faux bois planters - the same mold is used for both containers.


9 basket mold setting


10 finished basket containers


11 Small basket with larger basket on top


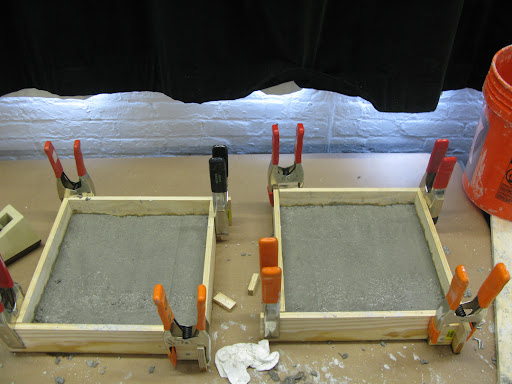
12 Table top slabs setting


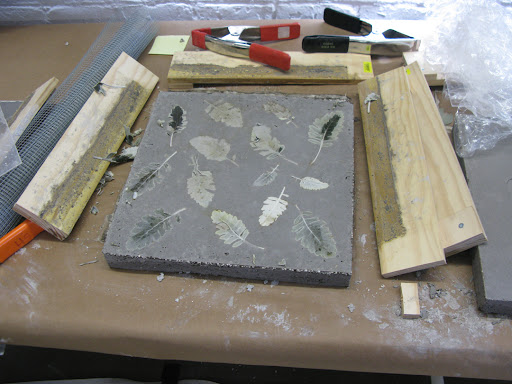
13 Table top slab with dusty miller embedded


14 Table top slab with eucalyptus embedded


15 Finished table top embedded with elephant ear leaves


16 These containers were molded from milk and orange juice cartons and colored with mason stains


17 These planters were molded from wicker baskets


"

Friday, March 12, 2010

Chicken Enchiladas with Roasted Tomatillo Salsa

While I don't each chicken, I am sure that this recipe can easily be altered to fit my dietary demands. BUT, the main reason I am posting this is to fantasize about this Roasted Tamatillo Salsa. What the heck!?!?! I cannot wait to make this the next time I get my hands on some tomatillos! Can you just imagine the combination of the smoke roasted flavor and the fresh tart flavor of the tomatillo! My Oh My!!!

Thank Sisters' Cafe for such a great recipe idea.


Chicken Enchiladas with Roasted Tomatillo Salsa: "
I have a weakness for tomatillos. They are delicious. The salsa used in these enchiladas reminds me of one of my favorite salsas, from Chili-rubbed Skirt Steak Tacos with Tomatillo-Avocado Salsa. (Yeah, it's a mouthful. If you haven't tried this recipe yet, you are truly missing out. It is one of my top five recipes.) I happened to get both of these recipes from my good friend, Katherine. Apparently we both love tomatillos! Anyway, these enchiladas were great! I had to keep smacking my husband's hand away as he tried to snitch from the chicken mixture that I was endeavoring to put into the tortillas! :) He kept saying, 'Wow, this is so good!'
I only had whole wheat tortillas on hand (which is all I buy, except for specific recipes), so that is what is pictured, but I would have much preferred them with flour tortillas. Even still, they were very tasty, and very different from the run-of-the-mill, dime-a-dozen enchilada recipe that we all use (and love - don't get me wrong!). These are different and delicious. So try mixing it up with your regular enchilada recipe! This one is definitely a keeper!

Oh, and by the way, try serving these enchiladas with Cilantro-Lime Rice and Garlic Black Beans. Those recipes can be found underneath the shredded sweet pork recipe, another one of my favorites!

Chicken Enchiladas with Roasted Tomatillo Salsa

Submitted by Erin ~ http://sisterscafe.blogspot.com/
Printable Recipe

Roasted Tomatillo Chile Salsa:
1 pound tomatillos, husked
1 white onion, peeled, sliced, quartered or whole
4 garlic cloves
2 jalapenos
2 teaspoons ground cumin
1 teaspoon salt
1/2 cup chopped cilantro leaves
1/2 lime, juiced

Enchiladas:
Extra-virgin olive oil
1/2 medium onion, diced
3 garlic cloves, chopped
1 1/2 teaspoon ground cumin
1/4 cup all-purpose flour
2 cups chicken stock, storebought (I used bouillon)
Chopped cilantro leaves
1 deli roasted chicken (about 3 pounds), boned, meat shredded - I used chicken breasts
Salt and freshly ground black pepper
10 large flour tortillas
1/2 pound Monterey Jack cheese, shredded
1 cup sour cream (plus extra for serving)
Chopped tomatoes and cilantro leaves, optional- for garnish
Guacamole, optional

Directions:
Preheat oven to 400 degrees F.
On a baking tray, roast tomatillos, onion, garlic and jalapenos for 12 to 15 minutes. Transfer the roasted vegetables and any juices on the bottom of the tray to a food processor. Add the cumin, salt and cilantro and pulse mixture until well combined but still chunky.

Meanwhile heat a 2 count of olive oil in a medium saucepan over medium heat. Add the onion and cook until soft and caramelized - this should take 5 to 7 minutes. Add the garlic and cumin then cook for a further minute. Sprinkle on the flour and stir to ensure the flour doesn't burn then gradually add the chicken stock to make a veloute. Continue stirring over a low simmer until the flour cooks and the liquid thickens. Turn off the heat, add half of the roasted tomatillo chile salsa, some additional fresh chopped cilantro and fold in the shredded chicken meat. Season, to taste, with salt and pepper.

Change the temperature of the oven to 350 degrees F and begin assembling the dish. Take a large baking dish and smear the bottom with some of the reserved tomatillo salsa. Now take the flour tortillas and briefly flash them over the stove-top flame (or put them briefly under the broiler if using an electric stove). (I just microwaved my tortillas for a second - the point is to make them soft and pliable.) Using a shallow bowl, coat each tortilla lightly with the reserved salsa mix. Put a scoop of the shredded chicken-enchilada mix on top of the tortilla followed by a sprinkle of the shredded cheese. Fold the tortilla over the filling and roll up. Place the tortillas in the baking dish and continue to do the same with all the tortillas. Finally pour over some more of the salsa and top with the remaining shredded cheese. Bake uncovered for about 30 minutes until bubbly and cracked on top. Garnish with cilantro and tomato.

Serve hot with the remaining tomatillo salsa, sour cream, and fresh guacamole, if desired.
"

Thursday, March 11, 2010

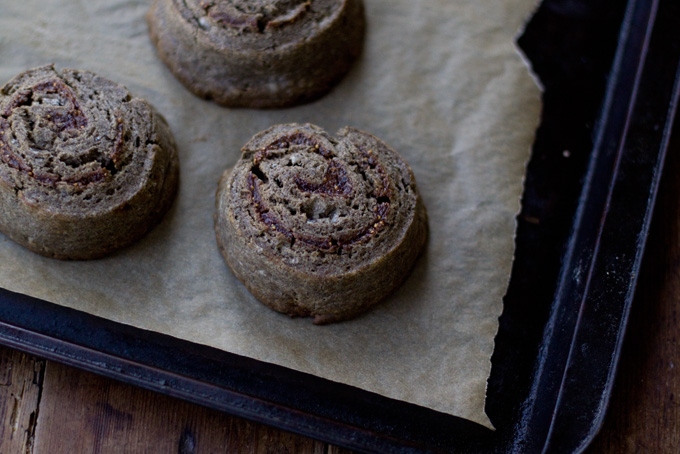
Figgy Buckwheat Scones

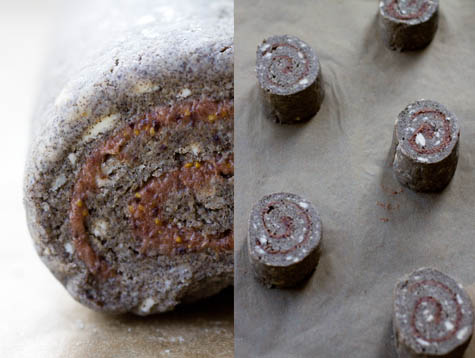
I used to make scones a lot but not so much any more...isn't it interesting how we go through phases in our cooking. My current kick is flourless baked goods. Anywho, these scones are like nothing that I have ever seen because they have this swirl of jam through them. I will have to give them a try.

Thanks for the great recipe idea!!!!


Figgy Buckwheat Scones: "

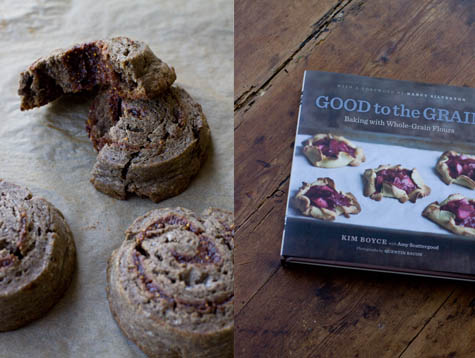
I've been waiting for months to write this post. The better part of a year, even. I'm positively itching to share this with you, so here we go. Late last summer (the lovely, gracious, talented) Luisa Weiss let me spend some time with the proofs of a baking book she was working on. She said she thought I'd like it. Which, it tuns out, was a dramatic understatement. The book she shared with me, Good to the Grain, is about baking with whole grain flours. It was written by Kim Boyce, and photographed by Quentin Bacon.


Figgy Buckwheat Scone Recipe


There aren't many people writing contemporary books on whole grain baking. Among those few, this one is special. In a sentence, a top-flight pastry chef intersects whole grain flours in her home kitchen. To back up a bit, Kim is a former pastry chef with major chops (Spago / Campanile) who left the professional kitchen to raise her family. Her book delves into her exploration of a broad range of whole grain flours, each of the twelve main chapters explores a separate flour - whole-wheat flour, amaranth flour, barley flour, buckwheat flour, corn flour, kamut flour, multigrain flour, oat flour, quinoa flour, rye flour, spelt flour, and yes...even teff flour.


Figgy Buckwheat Scone Recipe


Here's the quote I gave for the back of the book,'There was a point in my life when I realized limiting myself to baking with all-purpose flour was like limiting myself to painting with just one color. Kim Boyce's collection of beautifully rustic recipes inspires us to move enthusiastically into the rich palette of flavorful whole-grain flours and explore all they have to offer. I just can't get enough of this book.'


I wrote a good amount about baking with whole grain flours in SNC, but to see what someone like Kim is doing with them is both exciting and inspiring for me. I could tell at a glance, wow, she's really excited about them too. It felt good to know someone like her was (mostly ;) having fun exploring this range of flours and this approach to baking. I love seeing what she is doing, and now I know who to email when I'm stumped.


I could write an entire post about the photography in Good to the Grain, but I'll save that for another day. Instead, I'll leave you with a few notes related to the Figgy Buckwheat Scones I baked last weekend. They're a bit of a project, but a fun one requiring two main components - the obscenely addictive fig butter (dried figs, port wine, red wine, spices, sugar) and the buckwheat scone dough. Make the fig butter ahead of time, and the scone dough is a breeze to pull together. They're complex and jammy with a hint of sweetness and lots of flavor coming from the magical collision of the caramelized sugars in the fig butter and the hot baking sheet.


Related links:

- Kim Boyce (on twitter)

- Cheryl writes about Kim's muesli (here)

- Good to the Grain: Baking with Whole-Grain Flours


Continue reading Figgy Buckwheat Scones...