Thursday, April 29, 2010

printed curtains

Wow, this a great idea. I might just have to invest in the suggested stencil set. Thanks Wise Craft (A new blog I discovered this week)!


family room redo project :: printed curtains: "

(You may be wondering if I'll ever share our redone family room. I promise I will! As soon as its sunny and tidy in there at the same time.) In the meantime, here's another project from the redo.


DSC_4690

I am very much in love with the recently released Lotta Jansdotter Stencils. I knew I would use it as soon as I ran across it in the bookstore. You see, I happen to think printing fabric myself is fun, and Lotta's approach to stenciling feels very free form and doable, not intimidating in the least. This stencil set is a great supplement to her other printing book, but the great thing about this set is that it comes ready to use, with 10 pre-cut, reusable plastic stencils. Which puts it all one giant step closer to actually being used by me! (Because I am not a fan of cutting stencils. I will do it, but I will not enjoy it, probably because I'm usually overcaffeinated.)

When I opened up the family room visually (with lighter wall color, clearing out the clutter, smaller coffee table, etc), the side of the room with sliding glass doors suddenly felt too stark and empty. I decided simple curtains would do the trick, but too simple or plain wouldn't necessarily help fill the space, so that's where Lotta's stencils came in.


DSC_4687

I bought this amazingly lovely, gorgeously plain hopsack cloth from Joann's for about $5 a yard. Am I the last one to know about this fabric? Its cotton, sort of plaster-y natural color, and a simple square weave that feels and drapes a lot like linen, great for curtains. I now love hopsack and I would like to buy at least 100 yards of it please.


DSC_4695

Stenciling or printing some sort of pattern on them would help accomplish what I wanted. I used Lotta's leaf stencil and just did an all over pattern in a dark gray*, turning the template a quarter turn each time I moved it down, just to keep the look more random. Later I used another one of the stencils to add just a tiny bit of blue. Done. These curtains will not close often (only during the hottest afternoons in summer) and I'm not lining them, I just hemmed the panels on all 4 sides and attached them with simple clips at the top. (I promise to show them hung soon.)

DSC_4455

I can't stress enough how easy and satisfying this sort of project is, and how great this stencil set is. Now I want to find more things to use these stencils on. I'm looking at everything around here as a potential print surface.

*I used Delta Ceramcoat color 'Charcoal', and mixed it with Delta's textile medium (which turns acrylic paint into washable fabric paint) and it all worked great, although the hand of the painted areas is a little crispy. Its fine for curtains, but I wouldn't want to wear it.

<><><><><>

Totally off subject, but can we talk about 9 By Design? About the design team behind Sixx Design. For whatever reason, I really love this show, makes me want a big family. I loved this week's episode and the gym they redid.

Red Snapper in Salt

Wow he makes this look so easy! I really, really want to make this now.

Red Snapper in Salt: "

It’s a rare week here at Macheesmo when I post a poll and the thing that I actually want to win is the one that wins. But that’s exactly what happened in last week’s poll.


The poll winner, a fish baked in salt, left me standing in my kitchen last Sunday night, giggling like a school boy, as I played with a very good looking 3 pound red snapper and six pounds of Kosher salt.


It was an awesome and fun cooking experience.


If you can’t tell, underneath all of that salt there, is one whole fish.
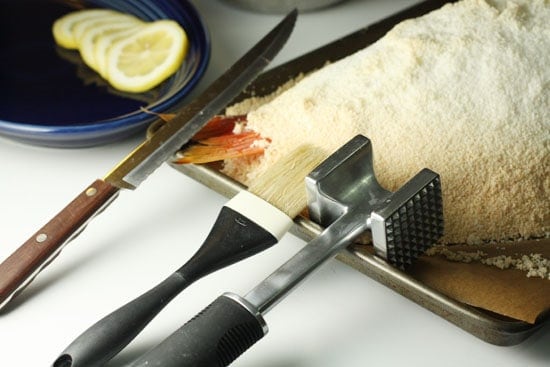

fish in salt

Artsy shot!


At first I was very excited to make this meal, then I was slightly nervous, then scared, and finally excited again. What’s funny about this dish is while it looks intense, it’s actually one of the simpler ways to cook fish because it basically ensures a tender result unless you forgot about your fish in the oven and went to the movies or something.


Red Snapper in Salt (Adapted from Alton’s Recipe)

Easily serves 4


- 1 3-5 pound whole fish, red snapper or bass work great, fins and gills removed

- 2 (3 pound) boxes of Kosher salt

- 4 egg whites

- 1/2 Cup water

- 1/4 fennel bulb, sliced thin (use the rest for a salad)

- 1 lemon, sliced thin

- 1/2 orange, sliced thin (use the rest for a salad plus maybe one full orange)

- A few sprigs of thyme

- A handful of parsley

- Olive oil for drizzling


Preparing the fish. There’s only a few important things to remember about the fish in this dish. As always, get the fish as fresh as you can. I got this red snapper from my local fish market and they even cleaned it to my specs which was lovely of them.


There’s really no way you could do this with anything less than a whole fish (although you can use two smaller fish). Without a whole fish though, the meat would get too salty. Have your fishmonger (or do it yourself if you are privvy) remove the gills and fins on your fish. Leave the skin and scales on. That’s right, you don’t even need to worry about the scales. If your fish already happens to be de-scaled that’s just fine though.


The only chance we’re really going to have to flavor this fish is right at the beginning so let’s stuff it with lots of citrus and herbs right away. These for example:
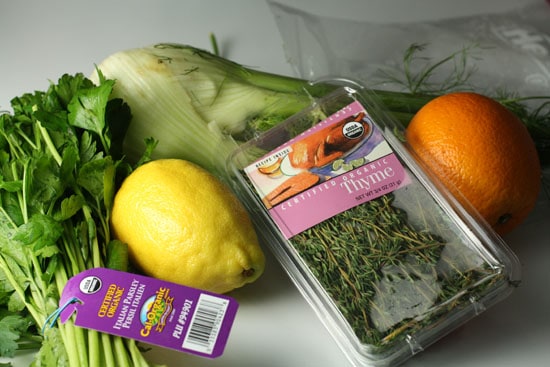

stuffing

Lots of flavor here...


Slice up everything pretty thin so it’ll fit nicely in the fish cavity.
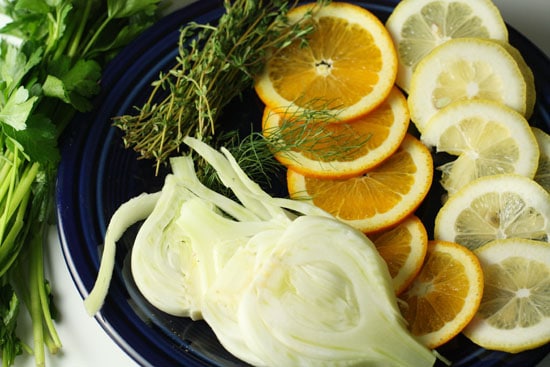

slicing the fillings

Go thin on the slices.


Once you have your fish, rinse it with cold water and pat it dry with a paper towel. Then stuff it full of the herbs and fruits.
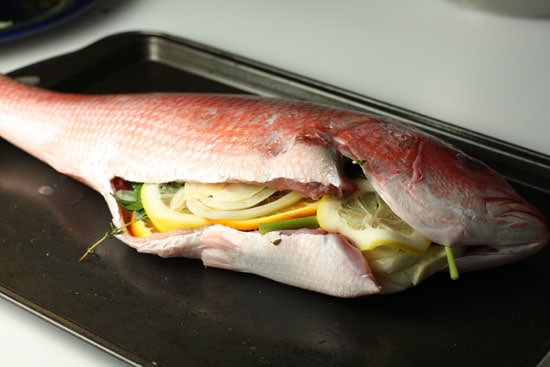

fish stuffed

Stuffed full!


Playing with salt. When your fish is ready, you need to make the salt mortar. I’m not really sure if that’s the right word for what this is, but basically it’s a mortar like you would use for laying brick I imagine.


Whatever you want to call it, it’s really fun to make.
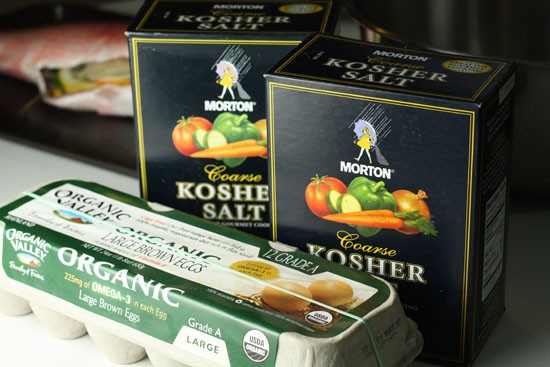

salt

This made me giggle.


To make the mortar, just mix the salt, egg whites, and water in a large bowl. It should be slightly moist and clump together if you press it.


Next, line a baking sheet with parchment paper and then scoop about 1/3 of your salt mortar onto the parchment paper diagonally. Make sure that there aren’t any whole or gaps in the salt crust! Then lay your stuffed fish right on top of the salt. It’s okay if the head and tale stick out a bit.
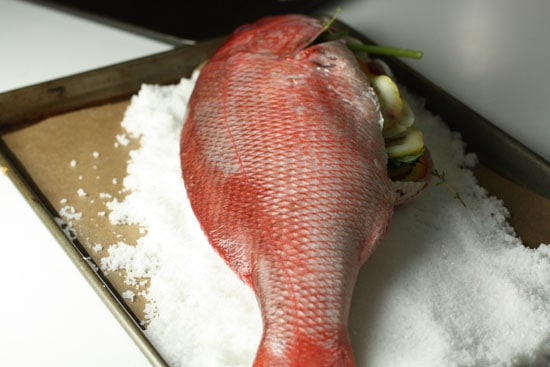

Salt Dome Building

This is fun cooking.


Next, start packing the fish in salt! You want to form a dome shape around the fish. Try not to press really hard or you might damage the fish. Just gentle shape the salt. Try not to get in a hurry. It’s kind of fun!
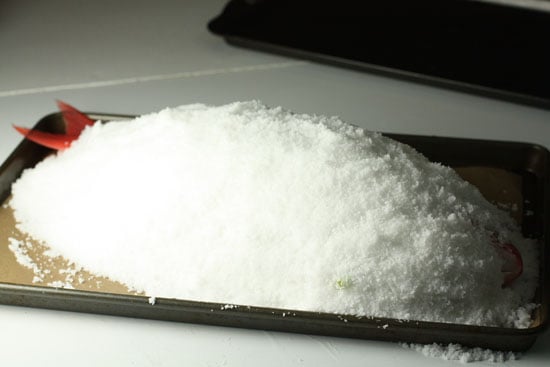

dome finished

I used all the salt.


Make sure your oven is preheated at 450 degrees and then bake this very heavy thing for 25-35 minutes depending on the size of the fish. For a 3 pound fish, mine was actually a bit overcooked after 30 minutes (although it’s fine to overcook this fish a bit. It’s still very moist).


If you have a meat thermometer you can poke it through the salt crust after 25 minutes or so and get the temperature of the fish. 130 degrees or above and you’re all set. Be sure to let your salt dome rest at room temp for 5 minutes before cracking into it.


The Fun Part. Getting the fish out of the dome was actually very easy. Use a small hammer or mallet to lightly crack the salt shell all the way around the fish. It should lift right off. Use a small pastry brush or something to dust off any salt that’s stuck to the fish.
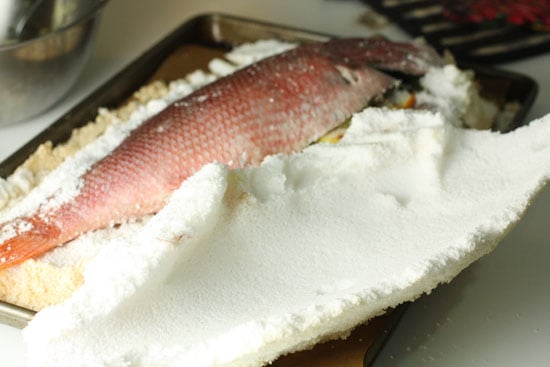

Cool.

So cool.


Next, use a sharp knife to gently slice all the way around the top layer of skin and then just peel it back. It should come off really easily in one piece. It’s pretty amazing actually.


After the skin is off, use a knife or small spatula (or pie server) to gently lift the pieces of fish from the top side of the fish. That should expose the spine and bones which you should be able to grab by the tale and gently pull off.


Pretty cool.
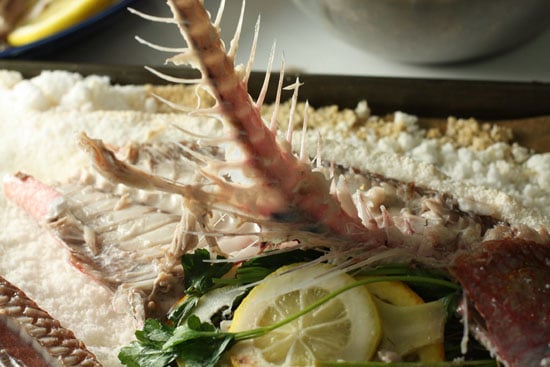

fish bones

Tipsy was not impressed.


Then you’ll have the same amount of fish underneath the spine which you can scoop off the bottom layer of skin.


If any of that was terribly confusing to you, Alton has a video of the whole thing. If you want to skip to the end part of getting the fish out of the salt, it starts around 7:30 in that video.


If you wanted to be really crazy, I guess you could just serve the fish intact at the table, but I thought it was nice to pull off all of the fish fillets and serve them with some lemon slices.


This is a lot more food than it looks.
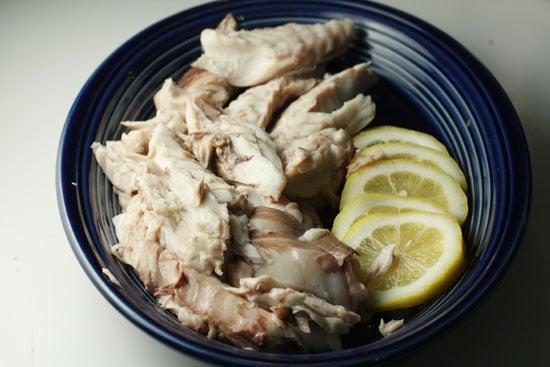

fish filets

It's actually a lot of fish.


I served my red snapper with some brown rice and a quick salad using the fennel and orange I had left over from the stuffing. I should’ve just went the extra step though and made this fennel and orange salad which goes perfectly with fish.
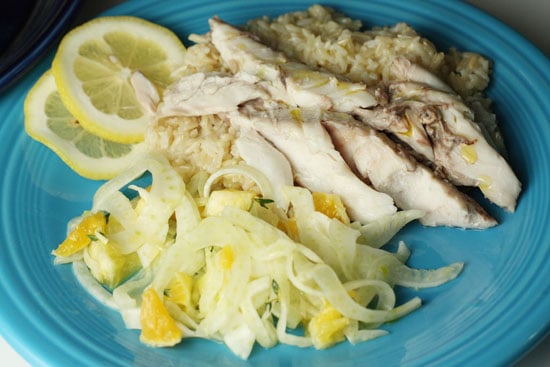

finished meal

Healthy dinner!


Not only was this meal very delicious, I think it would’ve been pretty hard to mess up. Like I said, I actually overcooked my fish by about 10 degrees and you would’ve never known. The salt keeps all the moisture and flavor trapped in so it gives you tons of room for error in the cooking.


So if you’re in the market for something different and fun, I thought this was a fantastic dish!


Have you ever tried this? How’d it go? Cooked anything else in salt?


"

Tuesday, April 27, 2010

I just FELT like crafting!

I can make this! However, it would take a lot of felt which I don't have......My mother does have a lot of wool so maybe I should first learn how to felt!


I just FELT like crafting!: "

detail of felt rugWe love felt. I think I speak for all of us here in the TV craft department when I make that statement. We use it so often—on all different kinds of craft projects—that we have amassed quite the collection of wool felts. All our felt is stored in plastic bins by color and take up a large portion of our fabric section. We keep one bin just for scraps labeled appropriately 'felt bits'. That bin was depleted for a while when I went haywire on it back in August.

What should have just stayed small, like the original idea below, just kept growing and growing. Before I knew it, I had used all our green felt and had more of a doormat than a trivet!


felt stump trivet


Everyone agreed that the time and money put into this 'mat' was too much to just be stepped on, so it's been sitting on a shelf for months now. I was thinking maybe I should just go for it and make a full size carpet, what do you think?


Back
Next
1 of 11


1 scrap felt mat


2 felt rug


3


4


5


6


7 felt scraps organized by color in Ziplock bags


8 orange scraps cut into half inch strips


9 roll strips into a coil and use hot glue to secure in place


10 finish with one strip, start the next one right after, butting up the ends


11 run the glue along and roll.


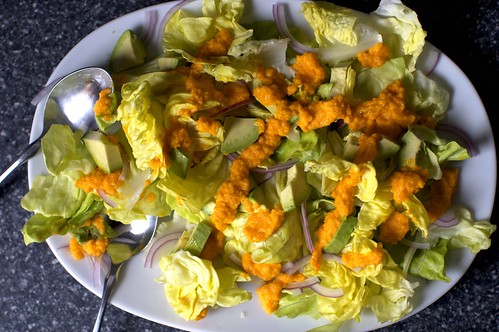
avocado salad with carrot-ginger dressing

Look at the recipe that smittenkitchen.com put up. I love a good ginger dressing and believe it or not, I have never made one (neither "good" nor "bad). Once we are moved this is going to be on the top of my Food To Do list.

In other news, I am powering through our pantry items. Yesterday I made rye crackers and sandwich bread from King Arther's cook book (together a good 6 cups of different flours). Also, I made a split pea soup with the last dry pack of peas. The soup was better than I thought it would be. I replaced the celery and carrot ingredient suggestion on the back of the bag with canned tomatoes and basil. So, it was more Italian inspired. I cannot wait for lunch left overs.


avocado salad with carrot-ginger dressing: "

avocado carrot ginger salad


A few weeks ago, a commenter (hi, Kate!) tipped me off to the Avocado Salad with Carrot-Ginger Dressing in Gwyneth Paltrow’s GOOP newsletter. Yes, that Gwyneth Paltrow, from Duets! She has a newsletter dedicated to “nourishing the inner aspect” which I have to be completely honest, I have no idea what that is and hope that doesn’t mean I don’t have one. I’m also not convinced that I’m full of impurities and toxins, thus I’m not really into cleanses and detoxes she discusses in this newsletter and I’m understandably suspect of borderline-starvation fasts that promise a quick shedding of holiday excess.

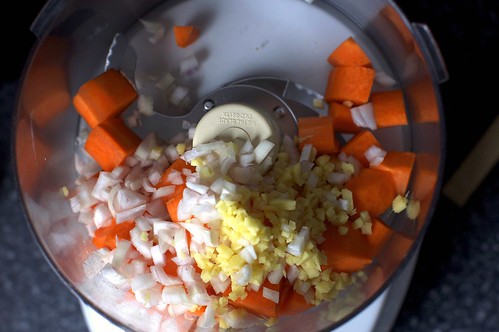
carrot, ginger, shallot, onion, avocado

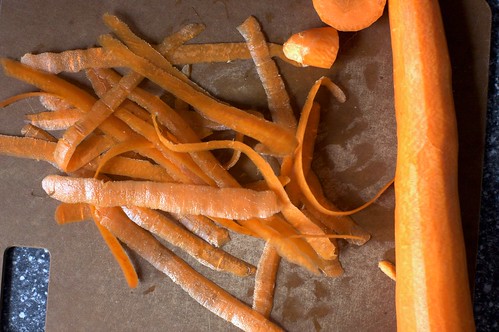
a carrot


But I really love a good avocado salad. And my husband thinks that carrot-ginger dressings are pretty much the best thing ever. He always talks about one he’d get in college from a place called Around the Clock (it is now a Japanese bakery, next to St. Marks Books) and how he’d always crave it and how nobody really makes it as perfectly as they did, or nobody before I tried Paltrow’s version — “You got the recipe just right!”


into the food processor


... Read the rest of avocado salad with carrot-ginger dressing on smittenkitchen.com

Friday, April 23, 2010


In yet another attempt to rid our house of pantry/ freezer items, I am making a banana-coconut bread. There are both bananas and left over coconut in the freezer so I am making something based on this recipe: http://nutritiontokitchen.com/2009/02/06/banana-coconut-bread/

wish me luck!

****This photo is borrowed from the Nutrition to Kitchen blog.****

Thursday, April 22, 2010

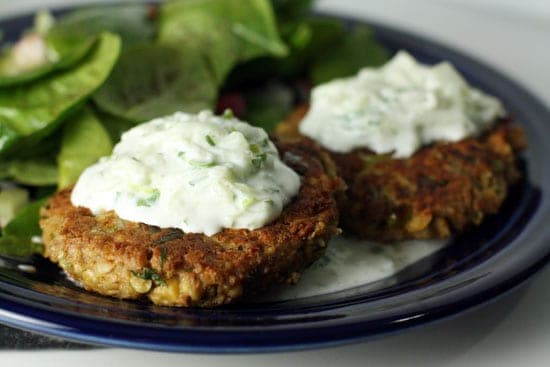
Chickpea Patties

David and I are moving in about two weeks so we are systematically trying to clean out our pantry. That means that we have stopped buying bread and are trying to use all of our flour and yeast to make bread. We are getting to the point where we are having to get a little creative with the meals. We are almost out of wheat flour and are going to have to start in with the oat, rye, and rice flours for bread. Also, we are trying to use all of our canned and dried beans and grains. I think this recipe by Macheesmo will allow use to use the two remaining cans of chickpeas we have left in our pantry!


Chickpea Patties: "

It’s no secret that I’ve been trying to eat less meat this year. I’ve found it easier than I expected honestly, but I’m always on the look out for quick and easy veggie meals that are packed full of flavor. That’s exactly what you’ll get from these chickpea patties.


The alternate name for chickpea patties is Falafel on Steroids. But really they don’t taste that much like falafel other than the fact that they are made from chickpeas (Garbanzo beans depending on where you’re from).


Served with a simple salad, these are a great dinner.


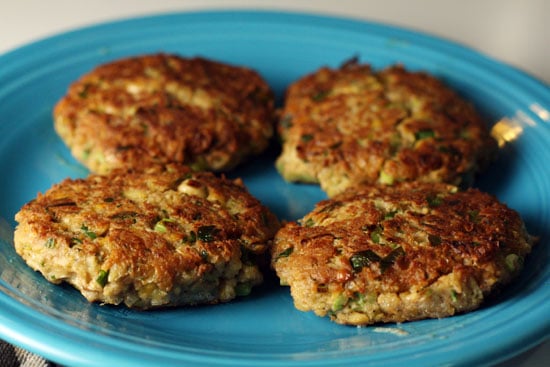
chickpea patties

Healthy AND Tasty


There are two parts to this meal that make it special. First, the garam masala. It’s fantastic and I doubled it for my version over the original recipe. Second, the greek yogurt sauce is very good. One of the better versions I’ve had.


Also, this looks like a decent list of ingredients, but there’s a lot of duplicates actually so it’s really easy to prep if you do everything at once.


Chickpea Patties with Yogurt Sauce (Adapted from America’s Test Kitchen 30 Minutes Suppers )

Makes 8 patties.


- 2 (15-ounce) cans chickpeas, drained and rinsed

- 2 Teaspoons garam masala (original is 1 tsp.)

- 2 Tablespoons olive oil

- 2 eggs

- 1/2 Cup toasted bread crumbs

- 4 scallions, minced

- 1/2 Cup Greek yogurt

- 3 Tablespoons cilantro, minced

- Pinch of salt


Tzatziki Sauce:

- 1 Cup Greek yogurt

- 1 cucumber, shredded

- 2 Tablespoons scallions

- 1 Tablespoon cilantro

- Pinch of salt


Making the Tzatziki. The next time I make this, I’m going to make a double batch of the sauce. It would be so good on pita as a snack or on a ton of different sandwiches. In all seriousness, I could eat it with a spoon.


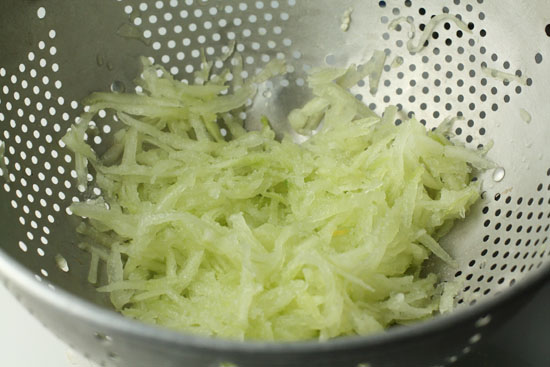
The only hard part (and it isn’t that hard people) of making this particular tzatziki recipe is shredding the cucumber. Sometimes I like it chunkier, but shredded was nice for this version. Basically, just peel your cucumber and scoop out the seeds with a spoon. Then shred it into a colander using the large holes of a grater.


Sprinkle a pinch of salt on the shredded cucumber and let it sit for 10-15 minutes. It’ll lose some moisture so you may want to set it over a bowl or a few paper towels.


shredded cucumber

Peeled, seeded, shredded, salted.


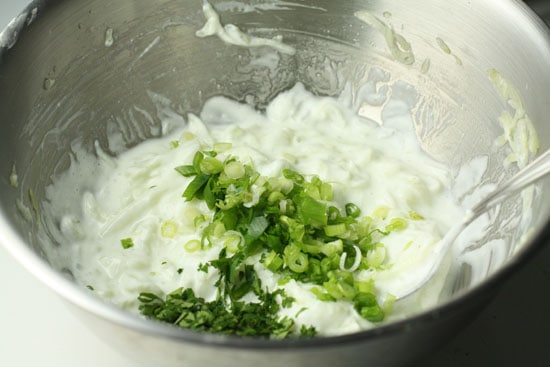
Once your cucumber is ready, just mix up the rest of your tzatziki ingredients in a big bowl. It should be pretty thick. Take your time chopping your ingredients evenly so you don’t get a big bite of scallion or something.


yogurt sauce

Nice and tangy.


This will keep fine in your fridge for a day or two or probably longer but it won’t last that long.


Making the patties. These patties are pretty easy to make and while the original recipe only makes 6 patties, I was easily able to get 8 good sized ones from the recipe.


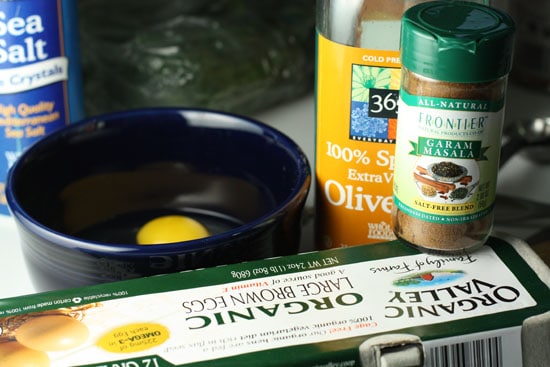
patty ingredients

Not pictured: breadcrumbs and chickpeas


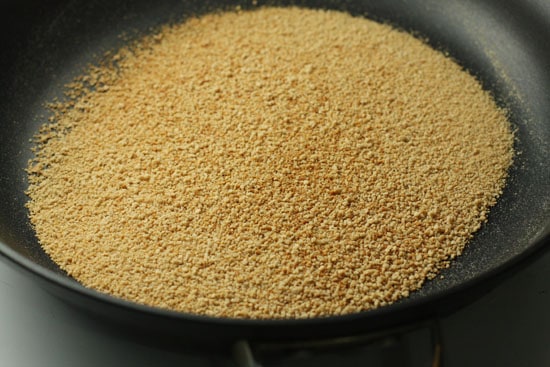
To start, I added my breadcrumbs to a dry pan and toasted them over medium heat for about 5 minutes. You want them a light brown color, but definitely not burned. They should look something like this:


toasting

Don't burn them!


That’ll give them a slightly nutty flavor and also help them absorb even more moisture.


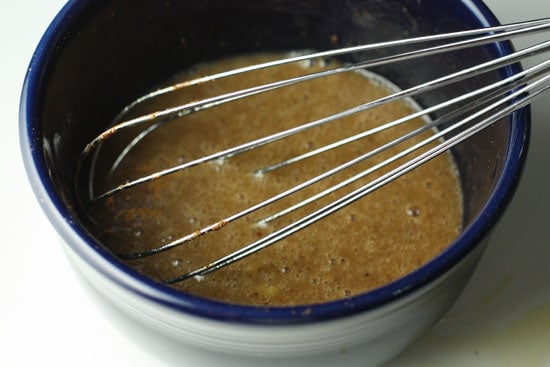
Next, whisk together your eggs, garam masala, oil, and pinch of salt into a small bowl. It’ll look strange, but smell really good.


spice mixture

Smells good.


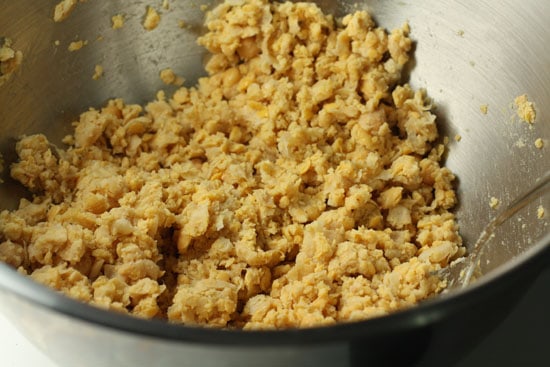
Add all your drained and rinsed chickpeas into a large bowl and mush them up with either a fork or a potato masher. I used a fork and left mine pretty chunky actually. You could make it smoother if you wanted, but I’m lazy.


Mush

A fork is your best bet for this.


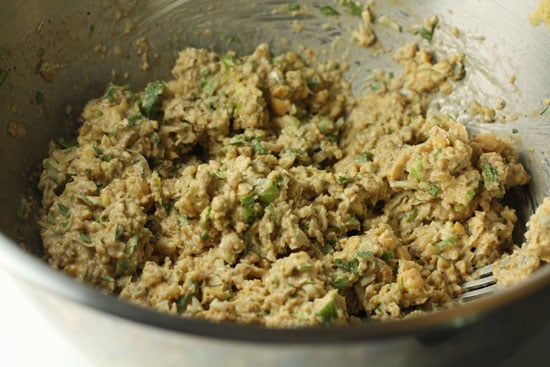
Then stir in your egg/spice mixture, breadcrumbs, and all the other ingredients. You’ll end up with this very thick paste of sorts. Again, it doesn’t look great, but it’ll smell really good and trust me it’ll taste good also.


finished mixture

I realize this does not look appetizing.


Making and Cooking the Patties. Forming the patties is straightforward enough. Just divide the mixture into 8 (or 6) equal parts and then form round patties out of the mixture about 3/4 of an inch thick. Try not to press the mixture together too much. Keep it light.


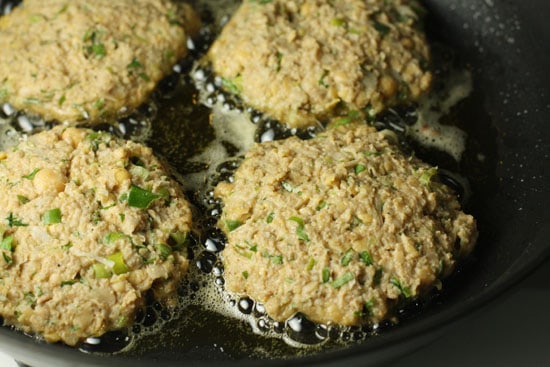
Then, in a pan over high heat, add 2 Tablespoons of olive oil and when it’s glistening, add your patties. You’ll probably have to work in two batches unless you have a really big pan.


frying patties

How about now?


Four to five minutes per side and you should end up with these lovely, browned patties.


fried patties

Or now?


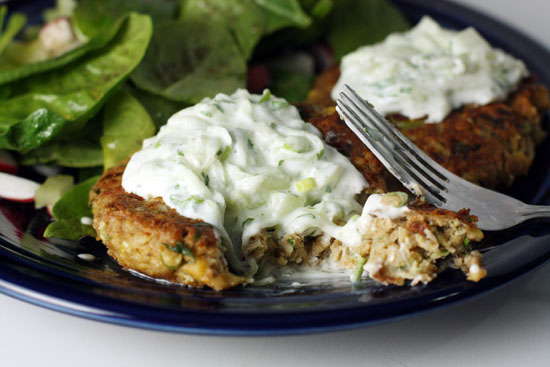
I served mine with a small salad and a good amount of the yogurt sauce. Very tasty!


bite

Would also be a good veggie burger!


As soon as I took a bite of this though, the first thing I thought of was veggie burgers. These would just rock as burgers. The burger route opens up a lot of options. Have the patties with a salad for dinner and then take one or two burgers for lunch the next day!


These are versatile and delicious little things. I didn’t miss the meat for a second when I was done eating them!


"

Wednesday, April 21, 2010

Adipoli Parathas

What the HECK!?!?! this looks amazing...however, it does seem like it would take all afternoon to make.

Thanks Food Stories


Adipoli Parathas: "


The tava is still my favourite new toy. For a while, I didn’t even put it away but just let it sit on the worktop so I could look at it more, like a new pair of shoes that you just can’t put in the cupboard. I started basic with chapatis and then felt ready to move on to parathas. It was supposed to be a gentle learning curve until I spotted this gorgeous stuffed version; it had to be done.


This is from the brilliant ‘Indian’ by Das Sreedharan; hopefully I won’t get into trouble for publishing another of his recipes. I can’t understand why the book isn’t more popular to be honest. I found mine for a stupidly low price and quite a few others have told me how they found it in a bargain bin. Das is from Kerala and it’s packed full of South Indian recipes; coconut, curry leaves and mustard seeds are predominant flavours throughout.


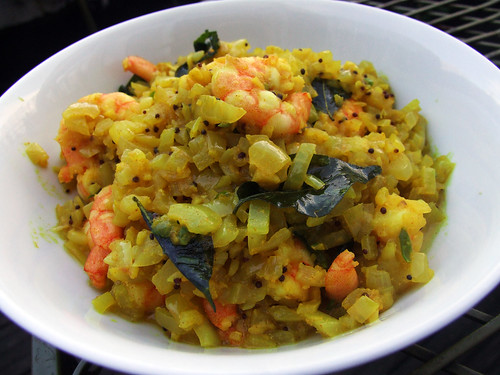
Apparently, this recipe is based on “the popular Ceylonese tradition of flat, thin bread dough stuffed with…seafood masala.” You make the paratha dough (wholemeal flour and oil) and then slap it on the hot tava before smearing with the mix of prawns, egg, onion, chilli and spices. This cooks briefly and then you flip so that the coating sears and sizzles instantly on the tava. You flip again and then roll it all up.


They are dangerously moreish. Crisp paratha and soft, spiced stuffing, fragrant with the essential curry leaf; every now and then a succulent prawn. It’s really tempting to re-make and pack ‘em to bursting but this is one of those times to resist – knowing when to stop and all that. They look weird while you’re cooking them (a bit like someone sicked up on a paratha – there’s no denying it), but once rolled, we’re talking high quality stuffed carb here – we ate four each in one sitting and yearned for more.


I suggest you make a steaming great heap of them. There’s nothing else for it. You won’t need any accompaniments except perhaps something to dunk them into – they’re a meal in themselves.


Adipoli Parathas (from Indian by Das Sreedharan)

(makes eight)


225g wholemeal flour

4 tablespoons vegetable oil, plus extra for brushing


For the filling


8 tablespoons vegetable oil

1/2 teaspoon mustard seeds

2.5 cm piece ginger, peeled and grated

2 onions, peeled and finely chopped

1 green chilli, chopped

10 curry leaves

1/2 teaspoon turmeric

150g raw prawns, peeled

2 eggs, beaten (I used 3)

salt


To make the paratha dough, put the flour in a bowl and gradually stir in the oil and about 150ml water to make a soft, pliable dough. Knead for 3-4 minutes, then return to the bowl, cover and set aside for an hour.


To make the filling, heat the oil in a frying pan. Add the mustard seeds and when the start to pop, add the ginger, onions, chilli and curry leaves. Cook over medium to low heat for 5 minutes, stirring every now and then until soft. Add turmeric and salt and cook for 1 minute then add the prawns until pink and cooked through. Remove the mix from the pan and set aside.


Divide the dough into 8 equal portions. Roll one into a ball before rolling out into a circle as thinly as possible. It should be paper thin and about 8-9 inches in diameter.


Heat a tava, griddle or frying pan and brush with oil. When hot, slap on a circle of dough (the heat should be medium). Cook until it starts to turn golden. Stir the eggs into the prawn mix, lower the heat and then spread 3 scant tablespoons onto the paratha. Leave until the egg is pretty much cooked and then flip, searing the mix onto the paratha. Wait until it is stuck well on there before you flip again and cook briefly. You want it nicely golden underneath.


You now just roll it up. I kept mine warm in a very low oven while I made the rest. I served them cut into two or three pieces each with a yoghurty dipping sauce which had some coriander, chilli and lemon juice stirred through (I think). A dusting of chilli powder on the parathas is really good.