Thursday, January 28, 2010

Spanakopita: Two Ways

I have NEVER found whole wheat or brown rice flour phyllo dough. I wonder why? I mean, I assume there is no gluten in brown rice but I think one could make it out of finely ground whole wheat....no? Thanks to Macheesmo for great ideas as always

Anywho, these look freaking good and I think i could use the filling to put into a pita pocket and bake that!

Spanakopita: Two Ways: "

Let the record clearly show: I was not defeated by spanakopita. After my abysmal failure last week, I bounced back, re-grouped, read about 20 different recipes, bought a bunch of spinach, and tackled it with a fresh pack of phyllo dough and a fresh attitude.


Just to show spanakopita who’s boss, I decided to make two different varieties: A larger spinach pie version and smaller individual spanakopitas that are easily frozen for later.


My results were much improved this time around!
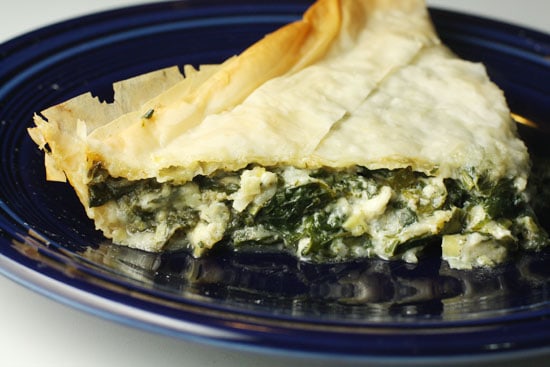

Spinach pie

A slice of pie!


Before I get down to business with this recipe, let me thank everyone who personally emailed me recipes. And who knew I had so many Greek readers! I got about 20 different spanakopita recipes. That’s pretty awesome stuff.


And I promptly decided to not follow any of them and instead try to meld them all into one master spanakopita recipe. So if you sent me a recipe, you’ll probably find little pieces that are yours, but it probably won’t look exactly like yours. But I would’ve never been able to get this far without all the recipes so thanks again spanakopita fiends.


Spanakopita

Makes a 9X9 pie and also 6 individual spanakopitas. It would probably make a 13X9 pie if you wanted to just do that or probably close to 15-18 individual servings.


- 2 pounds spinach (I got this from 4 bunches of fresh spinach, but you could also use frozen spinach)

- 2 leeks, washed and chopped

- 1 bunch of scallions, chopped

- 4 cloves garlic

- 3 Tablespoons olive oil

- 1 large egg

- 1/3 Cup chopped dill

- 1/2 Teaspoon cinnamon

- 1/2 Teaspoon ground nutmeg

- 1/2 Cup ricotta cheese

- 1 pound feta cheese, well crumbled

- Salt and pepper to taste

- 1 package phyllo dough or if you are making it, about 20 sheets

- 2/3 Cups of clarified butter or olive oil


Helpful Equipment:

-
Pastry brush! (Kind of a must have when working with phyllo dough)


Making the Filling. I used fresh spinach for this batch, but I’m fairly certain you wouldn’t lose much by using frozen spinach. I wouldn’t try canned though. Popeye can keep the stuff.


If you’re using fresh though, make sure your spinach is very clean and washed.
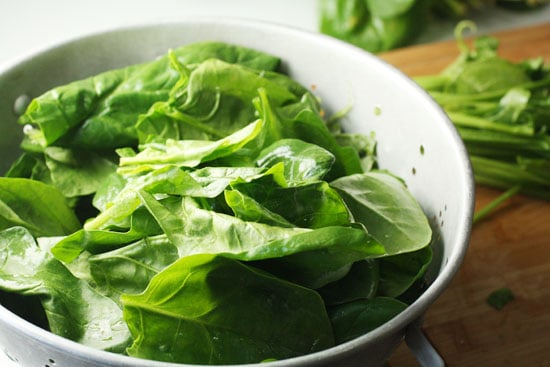

Spinach washed

You could use frozen.


Then blanch it for a literally a minute, using a colander, in simmering salted water. When you pull it out of the water, set the hot spinach in a few paper towels. Bunch of the paper towels and (over the sink) squeeze out as much moisture as you can.


Then give the stuff a coarse chop!


spinach chopped

Actually, this is a lot of spinach.


Once you’re spinach is done, chop up your leeks and scallions. Again, be sure to wash everything well. The leeks especially have a tendency to accumulate dirt between the layers. I like to split them down the middle and then wash them to get in all the layers.
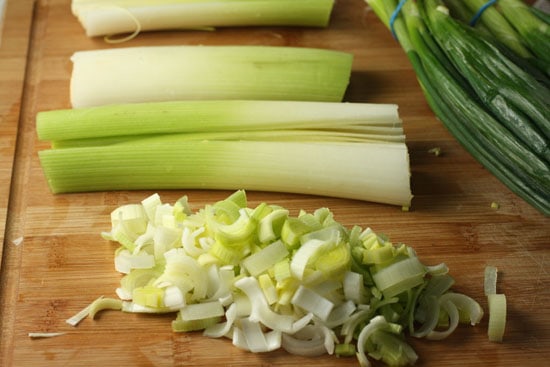

leeks

Chopping leeks!


Some of the recipes I read called for the leeks and scallions (if they were used) to be raw, but I decided to saute them for just a minute or two to bring out the flavors and soften them a bit. I sauteed them along with the garlic in about 3 Tablespoons of olive oil.
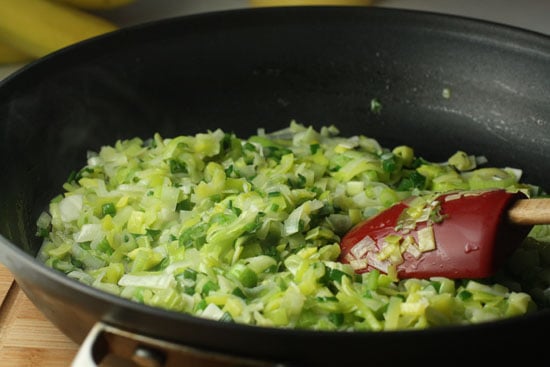

cooking leeks

Just a minute or two people.


Once those are cooked you can add them to the bowl with the chopped spinach.


Now let’s talk cheese. You could definitely use just feta for this and I think that would be just fine, but I decided to do some mixing and added a tiny portion of ricotta cheese.
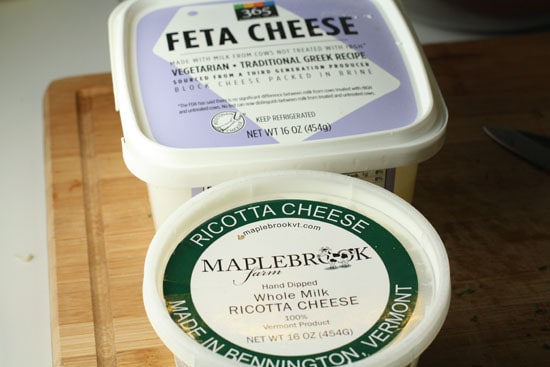

Cheeses

That's right. Ricotta baby.


The filling is pretty easy to finish at this point. Just mix together your cheeses with your vegetables and then stir in your egg, spices, and salt and pepper.


The only thing to remember on the cheese is to make sure you crumble your feta up very well before adding it in. Spend a few minutes breaking it up into tiny pieces.


This stuff was delicious just like this!
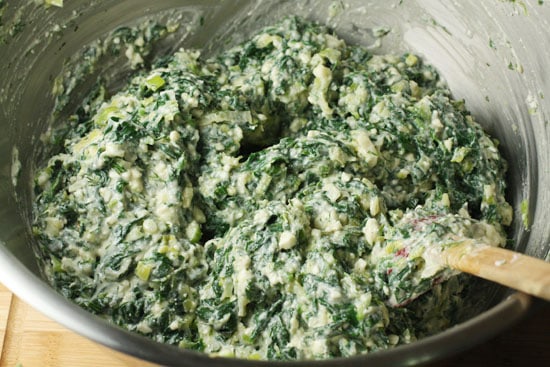

Filling done

Don't tell anyone... I snuck a few spoonfuls.


Dealing with Phyllo. Phyllo is fickle. The real problem with it is that because it’s so incredibly thin, it dries out very fast. So if you aren’t careful, by the end of your spanakopita adventure, your phyllo will be impossible to work with. It will just flake apart in your hands. Also, be sure to read the package to make sure your phyllo dough is thawed enough to work with!


The way to make sure it stays flexible is to keep your phyllo dough under a barely moist dish towel. Be careful to just barely get it wet (damp is the word that comes to mind) or it will fuse all your phyllo sheets together!


Making the pie. Basically, this pie is layers of phyllo dough, brushed with butter or olive oil in between and packed full of spinach filling.


This was my method:


1) In a 9X9 baking dish, brush the bottom with a light coating of butter and fit in your first layer of phyllo dough. If it rips a bit, that’s fine! The additional layers will cover your problems. (Top left)


2) After your first layer of dough, brush the surface well with butter and lay down your second piece perpendicular to the first – just to make sure the layers are even on the sides. I did 8 layers on the bottom, but I heard anywhere from 4-10 in the recipes I read. (Top right)


3) After you build a firm, solid base, poke it with a fork a few times so steam can escape. Then fill the shell with a good amount of filling. I filled it about 1/2 an inch high. (Mid left)


4) Then add two more layers of phyllo dough. (Mid right)


5) Then another 1/4 inch or 1/2 inch of filling. (Bottom left)


6) Finally add 4 more pieces of phyllo on top. Again, you always always brush with butter in between layers! When you’re done, you can fold over the edges toward the center so they don’t stick out too much. Also, you can pre-cut through all the layers to make it easier to get out. I just cut mine into 4 large pieces! (Bottom right)
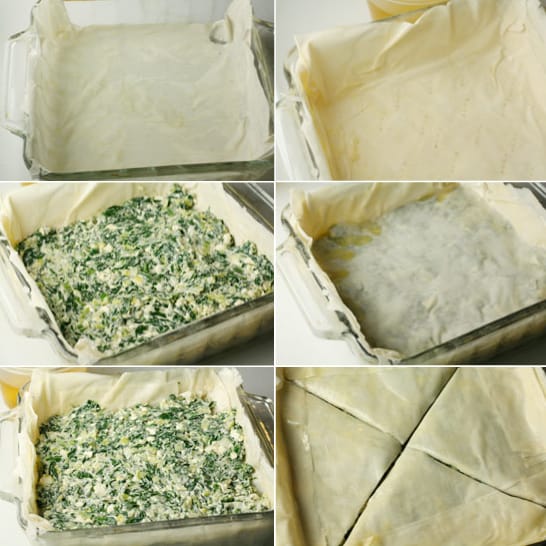

making the pie

Get it?


Bake this at 375 for about 35-40 minutes! It will be completely delicious.


Making individual pieces. Now for a different method.


1) Take one sheet of dough and brush it well with butter. (Top left)

2) Fold it in half horizontally and brush that surface with butter. (Top right)

3) Add a few Tablespoons of filling to the bottom right corner of the phyllo. (Bottom left)

4) Then fold the left corner over the filling to form a triangle! (Bottom right)
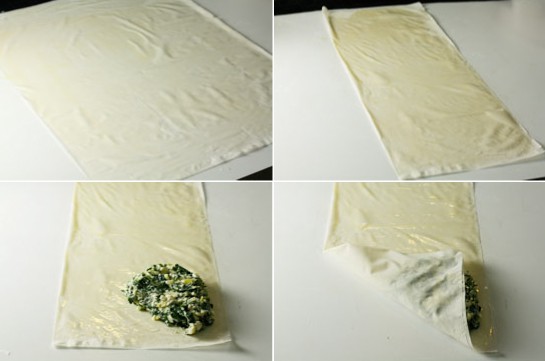

individuals

Perfect for snacking!


Then fold that formed triangle up and continue to fold up and over to make a nice-sized triangle of enclosed dough with filling! As you make these, brush them with yet more oil or butter and add them to a baking sheet.
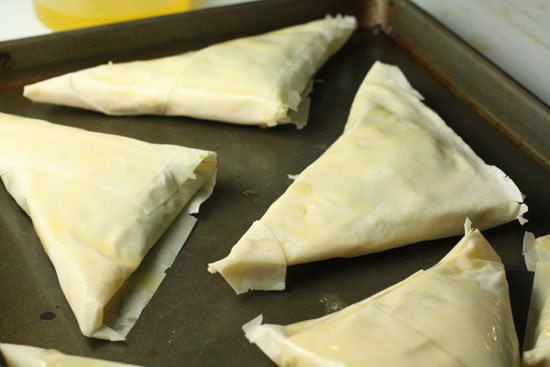

freezer ready

These keep excellently in the freezer.


Stick these in the freezer to freeze completely through and then take them out and wrap them in foil or plastic wrap and stick them all in a large sealed plastic bag to prevent freezer burn. They will keep in the freezer for a long time!


I made my individual spanakopitas while my larger pie cooked. This was the finished flaky version:
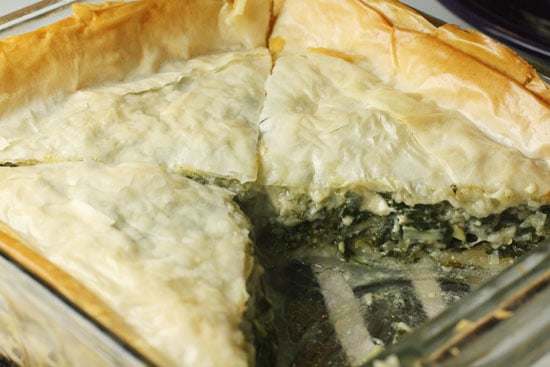

pie done

So delicious.


On the individual guys, you don’t even need to thaw them before cooking. Just toss them in a 375 degree oven for about 30 minutes and they will puff up, crisp up, and be as delicious as on day one!
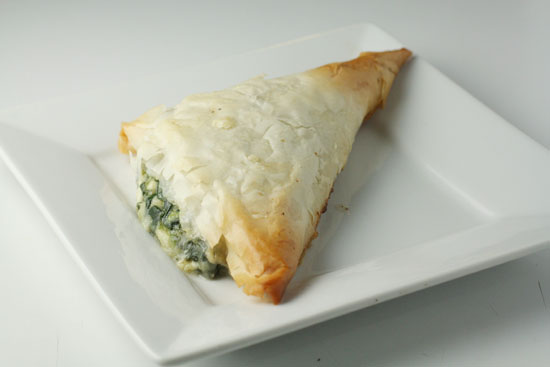

Single Spanakopita

Nice.


So that’s it! That was a long post, but hopefully it was useful! Both of these versions were completely delicious and so much better than my original fail.


Thanks again to everyone who sent me recipe ideas!
Wednesday, January 27, 2010

Sabse Borani

I am going to try to make this this weekend! yummy!


Sabse Borani: "


CIMG3825


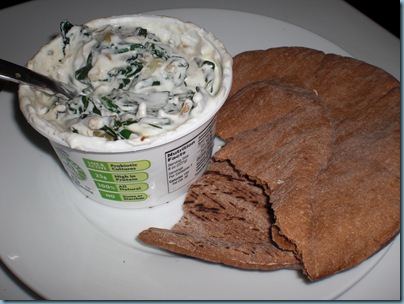
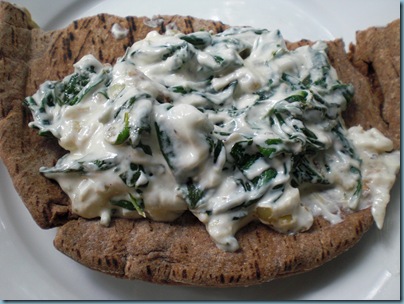
This simple Afghan dish is a new lunch favorite of mine and is definitely more than the sum of its parts. It is similar to a dip and is traditionally eaten with pita bread. Unlike most dips, however, sabse borani is filling and healthy enough to eat as a main dish rather than a snack food. As I have blogged before, I have a tendency to eat way too much cheese when I’m cutting back on meat, and this meal is a great way to get my dairy fix with more protein and less fat.


I’ve discovered that if you can find individual resealable yogurt containers, you can just load the mixture back into the original container and carry it with you, making it a very neat, portable lunch. I like to use low fat yogurt, which has enough fat to be sustaining without being too rich, but you can use whatever yogurt you have.


CIMG3818


Ingredients


  • 4 cups fresh spinach (chopped or baby)

  • 1 cup plain yogurt

  • 1 medium onion, sliced thinly

  • oil

  • a couple cloves of garlic, crushed or minced

  • Salt and pepper


Instructions


Cook the onion in the oil until it is golden brown, then add the garlic and cook just until it is fragrant. Add the spinach. When the spinach is wilted, take the mixture off of the heat and let cool slightly. Season with salt and pepper. Seasonings make or break this dish, so don’t omit the salt! Combine with the yogurt. Taste again for seasonings. Eat immediately or put in the refrigerator for later. Serve with warm pita bread.


"

Sunday, January 17, 2010

Like Sunshine On A Cloudy Day...

We are in the process of making this right now. As I hit "publish" I am walking to the kitchen to start this project. I have so much work to do today but these look SO good. I will, however, uses cow's milk and cow's butter in the recipe and omit the lemon extract opting to double the lemon. I hope they turn out well. Thanks for the post What Smells So Good, I hope mine turn out well.


------------------------------------------


Like Sunshine On A Cloudy Day...: "I won't lie. I love the song 'My Girl' by The Temptations - have ever since I first heard the tinny MIDI file in my grade 9 music class with Mr. Burford. It's been a tune that's always had a place in my 'Music' folder on my desktop, and upon hearing the first bars of the song I can't help but start humming, tapping my toes, and eventually singing along to each happy go lucky lyric.

Things like the perfect song coming onto the radio or my computer's playlist at the right time really go a long way to making my day - I'm a musically oriented person through and through, and I always need some sort of auditory stimulus in order to focus on anything! To my mom, it seems counterintuitive to have something 'distracting' going on in the background while I'm trying to concentrate, but it's always been like that with me, and often when I have a host of great songs with the right rhythm and beat playing away seemingly amazing results occur.


Such was the case with these sweet / tart lemon yellow yeast buns. Granted, they are not my pure creation - that honour and credit goes to the great minds at King Arthur Flour for the 'Lemon Love Buns' that inspired me. I merely opted to really jack up the lemon flavour in these with a triple dose of lemon extract plus lemon zest and juice, then made them dairy free with a touch of whole wheat for an added wholesome boost. Just because I wound up getting rather, should we say, lazy by the time it came to shape the dough into it's final form, I left the buns as round balls rather than shaping them into the pretty coils and hearts that KAF made, and simply glazed them with the egg white without doing the sugar sprinkle.


Regardless of the recipe I used or the changes I made, these buns (being sent to this week's YeastSpotting at Wild Yeast) really are the sunshine in a cloudy day. Not only to they emulate the bright yellow sun that struggles every Winter morning to peek through the clouds, but making them brings that immense sense of accomplishment and well being... because nothing smells better than a baking batch of bread!


Luscious Lemon Buns

Makes 10

3/4 cup warm, fat free soy milk, divided

3 tbsp sugar, divided

1 tbsp dry active yeast

2 1/2 cups flour

1 cup whole wheat flour

1 tsp salt

grated zest of 1 lemon

1 tsp lemon juice

1 tbsp lemon extract

1 egg + 1 egg yolk (reserve white for brushing tops)

1/4 cup margarine, cut into pieces and softened


  1. In the bowl of a stand mixer, whisk together ¼ cup soy milk, sugar and the yeast. Let stand 10 minutes.

  2. In another bowl, whisk together flours and salt. Set aside.

  3. Add the remaining soy milk, lemon zest, lemon juice, and lemon extract to the proofed yeast, stirring well.

  4. Add all the flour and, with the dough hook on low speed, begin combining.

  5. Once the flour has begun to incorporate, add the egg and egg yolk, then the margarine one piece at a time.

  6. Knead until all the ingredients are cohesive and dough is elastic, about 8-9 minutes.

  7. Place into an oiled bowl, cover and let rest 1 hour, until doubled.

  8. Punch down and divide into 10 even balls, placing onto a greased or lined baking sheet.

  9. Cover and allow to rise 1 hour.

  10. Preheat oven to 350F.

  11. Brush the reserved egg white over the tops of the buns.

  12. Bake for 20 minutes, until glossy and hollow-sounding when tapped.

Amount Per Serving

Calories: 239.0

Total Fat: 6.3 g

Cholesterol: 42.5 mg

Sodium: 76.9 mg

Total Carbs: 38.2 g

Dietary Fiber: 2.4 g

Protein: 7.6 g

baked egg

Yum, yum, yum...I love breakfast! breakfast, breakfast, breakfast! Baked eggs in general sound so good, however, I have never made them. When reading this post from I realized I don't have cute individual ramekins which prevents me from making this delicious morning delight as well as other individually portioned items. New Goal for the year: buy ramekins!

baked egg: "

baked egg


when the girl and i moved in together this past summer, we knew we’d have some doubles of kitchen equipment, but it didn’t become apparent how bad it was until we filled two giant plastic storage bins with extra utensils, plates, pots, broiling pans, and stand mixers (to be fair, the two stand mixers we have actually both belong to me). despite the excess, we somehow keep finding kitchen “things” that we didn’t know we needed – like mini ramekins. until recently, i figured they were only good for a) crème brulée and b) filling with mise en place on cooking shows. it turns out you can also use them to make an incredibly simple, fast and delicious breakfast.


baked egg


you can see here the basic ingredients for a baked egg (ironically my mise en place is not in ramekins). the original recipe i found used some fresh herbs and cheese, but i quickly realized this was an opportunity for me to bring back an old tradition. you see, back in college, my roommates and i made a lot of chicken parmesan. when we finished breading and frying the chicken, the two things we were always left with were eggs and bread crumbs. so, while the cheese melted on the chicken, we scrambled the eggs with the leftover bread crumbs, dubbed it “breggs,” and ate it as an appetizer.


baked egg


this is sort of a grown-up version of breggs. it can be fun to customize each one with different toppings – but any topping that requires cooking should be cooked beforehand, as they’re only in the oven for a few minutes. if you make a baked egg just right, breaking through the crust will reveal a perfectly runny yolk. it’s a deceptively easy breakfast that looks elegant yet rustic and tastes completely delicious. what are you waiting for?


baked egg


baked egg

recipe makes 4 eggs (1 egg per small ramekin). if using a larger ramekin, adjust measurements accordingly.


1/4 tsp minced fresh garlic

1/4 tsp minced fresh thyme leaves

1/4 tsp minced fresh rosemary leaves

1/2 tsp seasoned bread crumbs

1 Tbsp freshly grated parmesan

1 Tbsp crumbled cooked bacon

4 large eggs

2 tablespoons heavy cream

1 Tbp butter

salt and pepper to taste


1. preheat the broiler while you prepare the ramekins.


2. combine the garlic, thyme, rosemary, parmesan and bread crumbs. add 1/4 Tbsp butter and 1/2 Tbsp heavy cream in each ramekin. put the ramekins on a baking sheet and place under the broiler for 2-3 minutes, until melted and bubbly.


3. remove the ramekins from the oven and very carefully crack 1 egg into each. quickly sprinkle with the crumb/herb topping and place back in the broiler for anther 2-3 minutes. the eggs will continue to cook after you remove them from the oven. let cool for 1-2 minutes before serving warm.


"

Recipe:

Direction:

Alternatives:

Uses:

Friday, January 15, 2010

Cherry Pecan Bran Muffins

My last 3 to 4 baking attempts have ended in near disaster. I'm not sure what has been happening. It was suggested that I am trying to be too "creative," meaning I have been veering too far away from the recipe. In general, this is hard for me not to do because I am forever trying to eliminate processed sugars and replace with alternative sweeteners. This is a challenging for two reasons: 1 - the switch changes the consistency of the batter and 2 - reducing the sweetener often lessens the flavor quality of the baked good. However, this recipe from Pinch My Salt looks like it could hold up to my changes (switch a 1/2 cup of brown sugar with 1/4 cup agave nectar) with the dried fruit and the large amount of Bran. Also, I plan to toast the peanuts and add a dash of vanilla extract to diversify the flavor profile which will distract from the reduced sweetness.

Cherry Pecan Bran Muffins: "

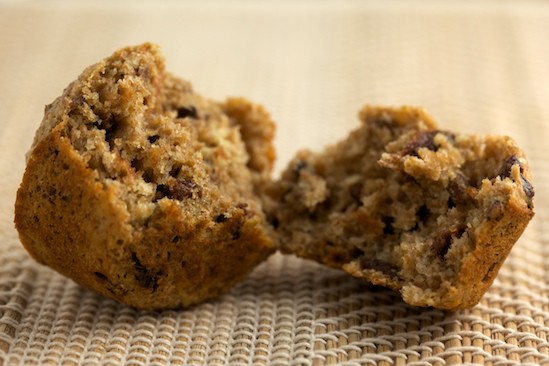
Cherry Pecan Bran Muffin


Sometimes I think I would be perfectly happy in the kitchen making nothing but muffins all day long. Quick to prepare and endlessly adaptable, muffins are fun, easy, and delicious – and I believe everyone should learn to bake them.


If you’ve been reading about my kitchen adventures for any length of time, you already know that I tend to make a lot of whole grain muffins. While I do love sweet, cake-like muffins, I decided long ago that if I’m going to snack on something that tastes like dessert, I’d almost always rather go for an actual cupcake.


So while my muffins might not fall into the category of health food, I do try to find a nice balance between flavor, texture, and nutrition. These cherry pecan bran muffins are no exception. The muffins are packed with fiber but aren’t overly dense or heavy; the tart cherries and pecans lend a wonderful flavor, but also pack a nutritional punch. Tart cherries are filled with antioxidants, are a natural source of melatonin, and might help to ease the pain of arthritis, and when taken out of the pie, pecans are good for you as well.


Cherry Pecan Bran Muffin Crumb


I’ve been eating these muffins for breakfast with a side of Greek yogurt, but they also make a great mid-afternoon snack. You may substitute other dried fruits or nuts for the cherries and pecans, but I found this combination to be a delicious one.


Cherry Pecan Bran Muffins


1 1/2 cups wheat bran

1/2 cup boiling water

1 1/2 cups all purpose flour

2 teaspoons baking powder

1/2 teaspoon salt

1 egg, lightly beaten

1 cup milk

1/3 cup canola oil

1/2 cup packed dark brown sugar

1 cup dried tart cherries, roughly chopped

1/2 cup chopped pecans


1. Preheat oven to 375 degrees. Prepare a 12-cup muffin tin with butter, nonstick baking spray, or paper liners.


2. In a medium bowl, stir together wheat bran and boiling water; set aside. In a large mixing bowl, whisk together flour, baking powder, and salt. When wheat bran has cooled, whisk in the egg, milk, oil, and brown sugar. Pour wet bran mixture into the flour mixture and stir with a large spoon until just combined. Fold in the chopped cherries and pecans.


3. Divide batter between the twelve muffin cups (a regular-sized ice cream scoop works well). Bake in a preheated 375 degree oven for 18-22 minutes, or until the top of the muffin springs back lightly to your touch or a toothpick inserted in the center comes out clean. Check early and don’t let them over bake.


Nutrition Info per serving (one muffin): 252 calories; 11 grams fat; 37 grams total carbohydrate; 4 grams fiber; 15 grams sugars; 5 grams protein. Nutrition information is approximate – analyzed through NutritionData.com


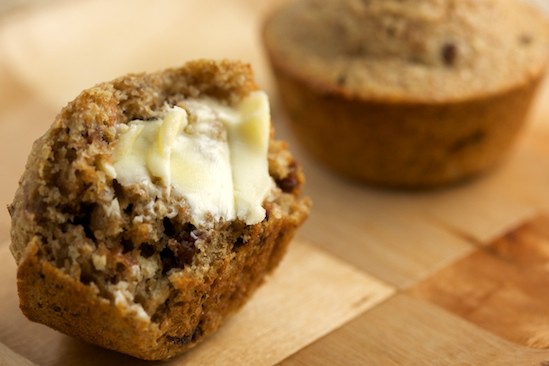
Cherry Pecan Bran Muffin with Butter


Related Recipes:


Around the Web:


Thursday, January 14, 2010

The Best Roasted Cauliflower, Broccoli, Brussels Sprouts

Roasting vegetables are one of my favorite ways to prepare veggies. Winter squash is great roasted with a touch of rosemary, s,&p. This post from A Mingling of Tastes is a three-way of roasted vegetables. Dave has recently touted that, "roasted broccoli is the best food on earth." While I cannot agree with such a bold statement, I do like them.


The Best Roasted Cauliflower, Broccoli, Brussels Sprouts: "When I cook things like this--veggie sides, basic grains, straight-forward salads--I don't usually blog about them. However, I noticed a theme in the what's been coming out of the kitchen lately. It's fabulous caramelized roasty deliciousness, and I wanted to keep track of it all right here. And I figured if I was so happy about finding a great new method for hearty winter vegetables, then some of you out there might want to hear about it too.

As I was typing up the last recipe for this post, another common thread jumped out at me: 450. That's the oven temp you need for a high-heat blast to give otherwise mild-mannered veggies amazing color and flavor. It's no secret that I like a bit of a crispy char on certain foods, but you don't need to blacken (or burn) anything to get the flavor you're after. For all of these recipes (the broccoli especially), just make sure the veggies are dry when you begin--water creates steam and gets in the way of browning.

I could eat a massive plate of these everyday. While nearly as virtuous as my stand-by of steamed vegetables with salt, pepper and a glug of vinegar, these recipes are so much more crave-able and, frankly, addictive (yes, I'm such an annoyingly healthy eater that I label vegetables addictive). That brings me to a note on serving size: For me and Mike, these recipes serve 2. Other recipes calling for similar quantities of vegetables may claim to serve 4. Don't be fooled--this is one of those time when you shouldn't practice portion control too strenuously.

Roasted Curry Cauliflower

I love to save a small amount of the roasted florets and dice them up for an omelet the following day. With more fresh cilantro and bits of Feta cheese, it's different and delicious.

Serves 2 generously

Cooking spray
1 head cauliflower, stemmed and cut into bite-sized florets
1 Tbs olive oil (optional)
1 to 1 1/2 tsp curry powder
1/2 tsp chile powder
1/2 tsp cumin
Coarse salt and freshly ground black pepper to taste
Chopped fresh cilantro and lime wedges for serving (optional)

Preheat oven 450. Line a baking sheet with foil and coat foil with cooking spray.

Put florets on baking sheet and drizzle with olive oil (or mist with cooking spray for a very low-calorie version). Sprinkle the curry, chile powder, cumin, salt and pepper over the cauliflower, then toss it all up with your hands. It should be well-coated with the colorful spices; if it looks sparse, add extra curry powder. Spread florets into a single layer.

Bake 25 to 30 minutes, tossing once about halfway through. Cauliflower are done when deep golden brown and fork-tender. Sprinkle with cilantro and lime juice if using and serve immediately.


Roasted Broccoli with Garlic and Lemon
To ensure the broccoli caramelizes and develops a fabulous roasty flavor, it must be completely dry. A bag of pre-chopped florets is handy for this; or just be one of those crazy people who pre-washes all their produce upon arriving home from the market. I'm most likely to wash mine a couple hours ahead and let it air dry on the counter, but if you don't have that kind of time, grab some paper towels and blot away. Just like roasted cauliflower, a few pieces of this stuff is amazing as an omelet filler along with bit of sauteed spinach and Feta.

Serves 2

Cooking spray
1 large head broccoli, stemmed and cut into bite-sized florets
1 Tbs olive oil
Coarse salt and freshly ground black pepper to taste
1 to 2 cloves garlic, thinly sliced
Red pepper flakes to taste
Lemon wedges

Preheat oven to 450. Line a baking sheet with foil and coat with cooking spray.

Put the broccoli on the baking sheet and drizzle with olive oil. Season with salt and pepper (I like this well-salted). Toss to coat the broccoli and roast 12 to 15 minutes (tender broccoli with thin stems will need just 12 minutes; if yours looks tough and thick, go the full 15). Florets should be deep golden brown.

Add the garlic and red pepper to taste and toss with the broccoli. Reduce oven temperature to 350, immediately return baking sheet to oven and roast 5 to 8 minutes more, or until edges of garlic are golden and broccoli is fork tender and deeply browned. Drizzle with lemon juice and serve immediately.

Roasted Brussels Sprouts
Browsing several recipes in order to settle on a cooking method, I noticed this bit of wisdom in Ina Garten's version, which was also echoed on Simply Recipes (click on the link for a lovely photo of a similar recipe): one of the keys to success is salting generously. I'm not sure why this is, but it does help turn these little sprouts into addictive, French fry-like treats.

Serves 2, may be doubled

Cooking spray
1 lb Brussels sprouts, tough outer leaves discarded, stem ends trimmed, and halved lengthwise
1 1/2 Tbs olive oil
1 scant Tbs apple cider vinegar
1/2 tsp coarse salt, plus more to taste
Freshly ground black pepper to taste

Preheat oven to 450 and place rack in upper third of oven. Coat a baking sheet with cooking spray.

Put Brussels sprouts on baking sheet and drizzle with oil and vinegar. Sprinkle with 1/2 tsp salt and black pepper to taste. Toss well and spread out in a single layer. Roast 25 to 35 minutes (depending on how large your sprouts are), tossing after about 15 minutes. Sprouts are done when they are deeply browned (outer leaves may be crisp) and very tender in the center. Serve immediately.
"

Wednesday, January 13, 2010

Tapenade Grilled Cheese

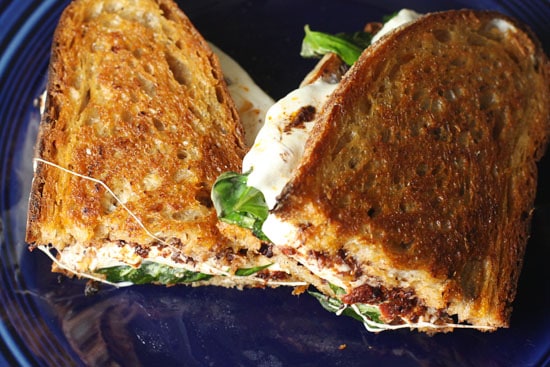
So, this sandwich would be much like a flavor bomb going off in your mouth when you take a bite. The tapenade look RIDICULOUSLY good. Come on, sun dried tomatoes, kalamata olives, and roasted garlic?!?!?! I don't think there is any way to improve that. However, I think the mildness of the mozzarella is great but kicking the sandwich up with some swiss or a touch of parmesan would be crazy good. I'm making the sandwich this weekend. Big thanks to Macheesmo.com for posting this one up!


Tapenade Grilled Cheese: "

I’ve had some pretty intense posts over the last few days (Review of Eating Animals and a post with excellent comments On Food Labels). So I thought I’d post something a bit more lighthearted today and revisit something that I used to do more frequently on Macheesmo, which is search for the perfect grilled cheese sandwich.


You can find all the previous entries under the Grilled Cheese Trials. Today’s entry is a tapenade sandwich with homemade bread and mozzarella cheese!


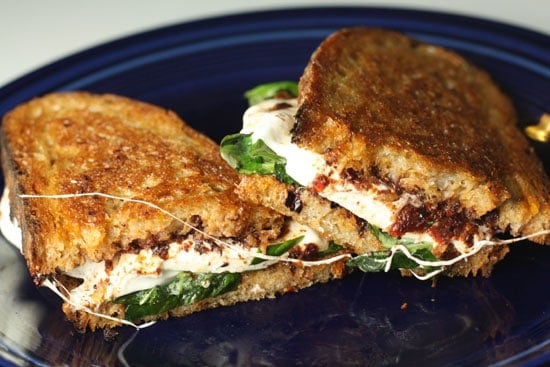
Tapenade Grilled Cheese

Um. Yes please.


I came up with this idea largely because I had some great tapenade ingredients left over from my Greek nachos experiment. I figured why not make a sandwich with them!


Grilled Tapenade Sandwich

Enough for 2 big sandwiches


- 1 head roasted garlic

- 1/3 Cup sun-dried tomatoes

- 1/3 Cup kalamata olives

- 2-3 Tablespoons olive oil

- Salt and pepper

- 6-8 ounces fresh mozzarella cheese

- Fresh basil

- 4 slices sturdy, rustic bread. A sourdough loaf would be good.

- 2-3 Tablespoons butter


Helpful Equipment:

- Mini food processor (obviously you could use the bigger version if you have that)


Making the Tapenade. You could make a more traditional tapenade with capers and anchovies if that’s your thing. I went with a roasted garlic and sun-dried tomato version though.


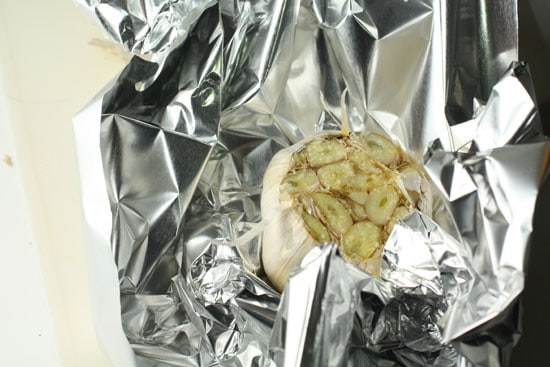
To start, you need to roast a head of garlic. This couldn’t be easier. Just chop off the top off an entire bulb, drizzle it with a bit of olive oil and a sprinkle of salt and wrap the whole thing in foil.


roasting garlic

Pretty straightforward


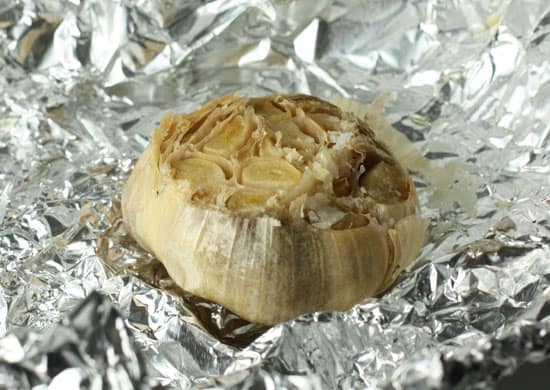
Bake it at 350 for about 30-40 minutes. Your house will smell delicious and the garlic should be a nice light brown color. Let it cool for a few minutes.


Roasted garlic done

If they made a candle, I'd buy a box.


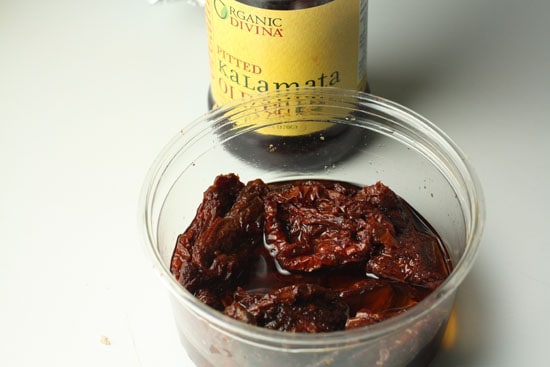
If you’re making my version of the tapenade you’ll need these things also:


Tapenade Ingredients

Ingredients for the tapenade.


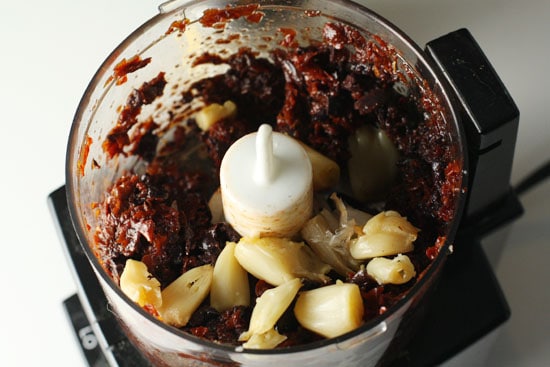
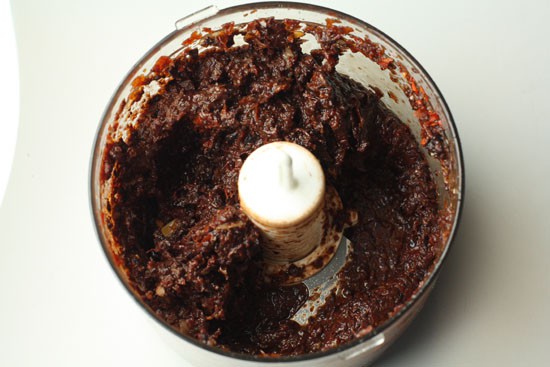
I have a tiny 3 Cup food processor that’s perfect for mixing up stuff like this. I threw in my sun-dried tomatoes first as they would be the hardest to chop and gave them a spin for a few seconds. Then I added my olives and finally my cloves of roasted garlic. Drizzle in a few tablespoons of olive oil until the mixture comes together.


garlic tapenade

Looks like a lot of garlic... don't worry.


It looks like a lot of garlic, but the flavor is actually pretty mild.


Pulse it a few times to combine everything and you’ll be all set. You don’t want to over-process this spread. A bit chunky is good in my book.


Tapenade Finished

Yum.


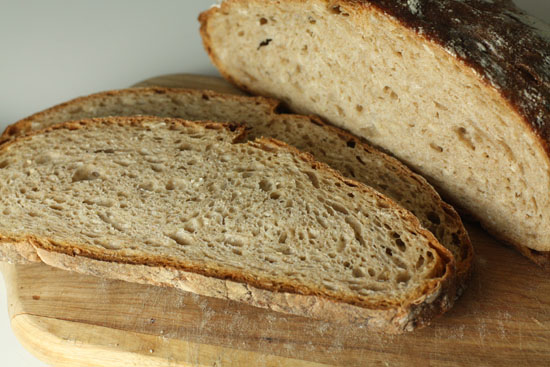
Making the Sandwich. I think that choosing the appropriate bread is one of the most important things you can do for a grilled cheese. For this sandwich, I think I chose wisely. I went with a rustic loaf of homemade no knead bread. This is actually my normal bread that I make once a week and it worked great with this sandwich. I wanted to make sure I had something hearty enough to stand up to the tapenade.


homemade bread

Can't buy this!


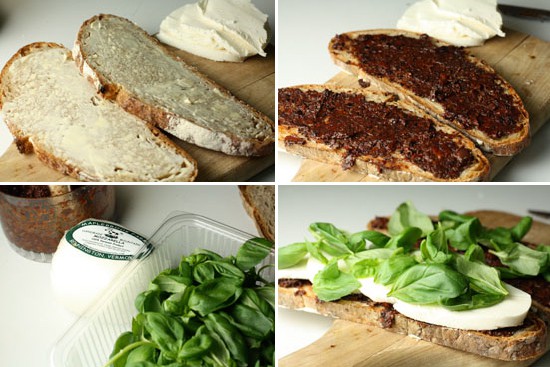
To get the sandwich ready, take two slices of bread and lightly spread butter on them. That will be the outside of the sandwich. Then flip the pieces over and slather on some tapenade onto both sides of the bread. Layer on sliced mozzarella and some fresh basil and smoosh it all together so the buttered sides are on the outside!


It’s ready for the heat!


Making the Sandwich

Get it?


The key thing about a grilled cheese is controlling the heat. To hot and you’ll burn your bread before your cheese is melted. Too low on the heat and you’ll starve before it’s done.


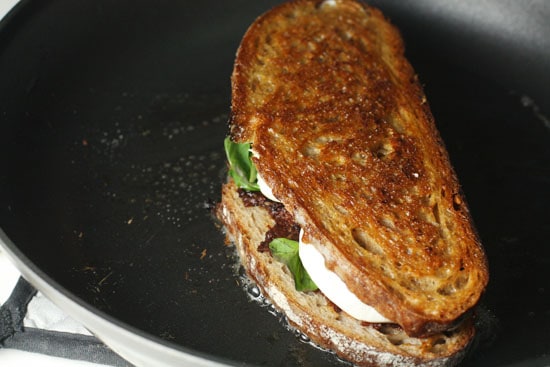
A medium to medium-high heat should be about right depending on your stove and pan. Just set the sandwich in and let it cook for a few minutes and gently give it a flip. These aren’t like pancakes, you can flip them over and over again and that’s just fine.


This is about as perfect as it gets in my book:


cooking the sandwich

Grill baby grill.


The good news about this sandwich is that mozzarella melts incredibly fast. So you shouldn’t have to worry about the bread being toasted before the cheese is melted.


Grilled cheese made

Nice.


As with all the other grilled cheese trial submissions, here’s my verdict:


Cheesiness: 7. I think mozzarella is better for pizzas than sandwiches. It was good, don’t get me wrong, but it was almost too melty. It made it kind of hard to eat!

Bread: 9. The bread was great. Nicely toasted with a good crunch to it. It held up perfectly to the toppings.

Fillings: 9. I swooned over this tapenade. I could just eat it with a spoon.

Overall: 8. Unfortunately, not the best sandwich I’ve made for this competition, but definitely a worthy competitor. I think if I subbed out a slightly more flavorful cheese, I’d be onto something.


Got an idea for a grilled cheese? Leave a comment!


"

Recipe:

Direction:

Alternatives:

Uses:

Orange Pumpkin Soup

After Halloween I tried to make some pumpkin bread TWO times and each time it was gross - flavor, texture, and smell...yes, the first one actually smelt real bad. So, I swore off pumpkin and turned to other winter squashes (butternut, acorn, and the like). I just came across this recipe from www.vegalicious.org and I think I may try again....doesn't it look just great. I mean coconut milk....crap that it going to be good!


Orange Pumpkin Soup: "

This cheerful soup brought lots of sunshine to our table on a cold winters day. The blends of orange and cardamom were a tasty compliment to the pumpkin.


Orange Pumpkin Soup


Serving Size: 4


Ingredients:


  • 2 tablespoons olive oil

  • 1 onion, chopped

  • 1 clove garlic, minced

  • 4 cups cubed pumpkin (med. hokkaido or red kuri)

  • 2 cups vegetable broth

  • 1 bay leave

  • 2 teaspoons ground coriander

  • 1 teaspoon ground cardamom

  • pinch sugar

  • pinch red pepper flakes

  • 1 orange, zest and juice

  • Salt and freshly ground black pepper

  • coconut milk (optional)


Orange Pumpkin Soup


Directions:


  1. Using a large soup pot, saute the chopped onion in the olive oil.

  2. When it begins to become transparent, add the chopped pumpkin, garlic, coriander, cardamom and orange zest.

  3. Mix well, and cook for about 2 minutes.

  4. Add the vegetable broth, red pepper flakes and bay leaf.

  5. Cook with a lid on until the pumpkin becomes soft.

  6. Puree and add the orange juice to make the consistency you prefer.

  7. Season to taste with a pinch of sugar salt and pepper and possibly additional cardamom.


Notes:


If you prefer a creamier consistency, you can add coconut milk, however, we found the soup to be perfect at this point. Optionally serve garnished with a few red peppers and coriander leaves.

Inspired by http://blog.mainefoodandlifestyle.com/2009/12/pumpkin-citrus-soup.html


"

Recipe:

Direction:

Alternatives:

Uses:

Potato and Oyster Mushroom Curry

This is from "Straight from the Farm". I have been really into curries recently and I think it would be a GREAT winter veg recipe to try!

yum


Potato and Oyster Mushroom Curry: "Tonight's recipe is the part two of my trio of posts on the new Indian dishes I made to branch out beyond my old favourites. It is based on a recipe that calls for shrimp, but uses oyster mushrooms instead. You could just use white or cremini mushrooms, but oyster mushrooms really are a treat because of their delicate texture and taste. This is also a quick and simple meal that can be on the table in about 30 mins. You will also note the naan sneaking into the picture (and in my last post). I use this recipe which is hands down the best I have ever made and is pretty close to the stuff actually baked in a tandoor oven.

INGREDIENTS
Serves 4
- 2 tbsp oil
- 1 onion, halved and sliced
- 1/2 cup chopped cilantro
- 8 oz oyster mushrooms, cut into large pieces
- salt to taste
- 1/2 tsp tumeric
- 1 tsp garam masala
- 1 tsp chili powder
- 1/2 lb potatoes, cut into small chunks
- 2 large tomatoes, small dice
- 1/2 cup water, more if needed
- 1 tsp lemon juice

METHOD
1. Heat oil in a frying pan over medium heat. Fry onions and cilantro for 5-7 mins, until soft and translucent. Add mushrooms, salt, and spices. Fry for about 5 mins, until mushrooms release their water. Add a splash of water if spices stick too much.
2. Add potatoes, tomatoes, and water and mix well. Bring to bubbling, then cover, reduce heat, and simmer for 15-20 mins, until potatoes are cooked. Add more water if it gets too dry, then stir in lemon juice and serve.
"

Recipe:

Direction:

Alternatives:

Uses: